System tab
The System tab allows you to define the following areas:
- Education Area
- Descriptors
- General Settings
- GDPR Settings
- Pupil Settings - the information you wish to collect about the pupils
- Teacher Pay & Contract Settings
- School Settings
Education Area
The first section under is the Education Area. Here you define the Education Sector your business is geared towards. For example, Dance, Music, Drama and Performing Arts. Only one Sector can be selected.
Next, select the Education Mode. Pick between Adult Mode, Child Mode, or if you deliver services to both select Mixed Mode.
You can then select the Education System you work in. This will tell the system when bank holidays fall.
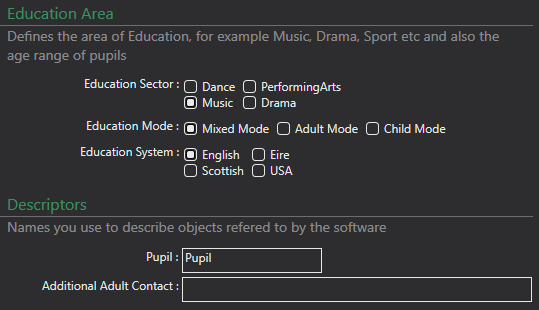
Descriptors
The Descriptors section allows you to edit the terminology used for Pupils, and Additional Adult Contacts and this gets displayed on the Portal. , You may call your pupils Students or Young Learners which you can enter in here, and your Additional Adults Second Contacts, or Parent 2 etc.
General Settings
Next are the general settings for your database.

Switch To Next Year Month - this is the month that the standard view within Xperios changes over to the next academic year.
Allow Two Tier Events - if this is enabled, you can create events where the applicants will require evaluation before they can attend.
Allow School Connections - enables the option where parents can link up to their child's tuition in the portal for school-billed activities. You can find out more about this process in the Pupils section > Gathering Pupil Data, here.
Use Pronouns - when this option is turned on, the Portal will ask for the pupils pronouns on application.
Use Pupil Exams - allows for teachers to enter details about pupil exams they have taken. For this you need the exam module turned on, and then you need to set up exam boards and grades, these can be found here.
Use Ethnic Groups - if this is turned on the the Portal will ask for the pupils ethnicity. These need to be set up which can be found here.
Use Funding - allows you to record the different type of funding that a school has. For example, you may have LEA funding, and Non-LEA funding. Once enabled you will need to set up the different Funding areas here before you can add then to a school.
Use Area - this is used to record the different area the school is in, e.g their geographical area. You will need to set the Areas up once this is enabled. Find out how by clicking here.
Use Department - lets you set up departments within your organisation which can then be used on service types to separate the different areas of your business. You can set up departments here.
Use Groups - turn this option on if you want to define roles for users of the system, and limit what areas of the system the users have access to. If this is turned on you must set up groups for your admin team and apply these to your users. To set these up see here, if you have these turned on you need to assign a group to everyone otherwise they won't have access to the system.
Use Faculty - allows you to set up faculties within the system which can then be assigned to teachers. These can be set up here.
Use Genre - are used on Groups (ensembles, rehearsals etc) so you can specify the genre of that group. To set these up see here.
Use Activity Groups - these are used to categorise activities. For example you may have a set of Activities called Violin, Cello, Brass. You can set up an Activity Group called Strings and assign activities to this group. This can be used for reporting on different areas in the system. If you want to use Activity Groups, you can set them up here.
Use Interest - this allows you to set up interest sources, which applicants will need to select from when applying through the Portal. You can therefore record where someone has found you from, and see where you might need push more. You can set these up here.
Use Nationality - if this is turned on, it will ask applicants for their nationality on application. These are pre-defined and pulled from Microsoft.
Use Country - will ask applicants for the country they are from.
GDPR Settings
The next section is GDPR. Here can define your GDPR compliance.
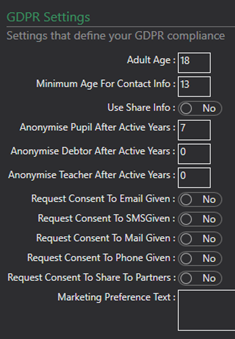
Adult Age - you can set the age that you class a person is an adult from.
Minimum Age For Contact Info - any pupils this age or above will be asked for their own email and contact number upon application.
Use Share Info - if this is selected, you can turn on the option to share group members details between members of the group. You control the actual sharing from within each group.
Anonymise Pupil After Active Years - the system will automatically anonymise a Pupil X years from last being active. Where X is the number you enter. The system will anonymise their name and contact information. Leaving this setting as 0 will mean the system will not automatically anonymise your pupils.
Anonymise Debtor After Active Years - the system will automatically anonymise a Debtor X years from last being active. Where X is the number you enter. The system will anonymise their name and contact information. Leaving this setting as 0 will mean the system will not automatically anonymise your debtors.
Anonymise Teacher After Active Years - the system will automatically anonymise a Teacher, X years from last being active. Where X is the number you enter. The system will anonymise their name and contact information. Leaving this setting as 0 will mean the system will not automatically anonymise your teachers.
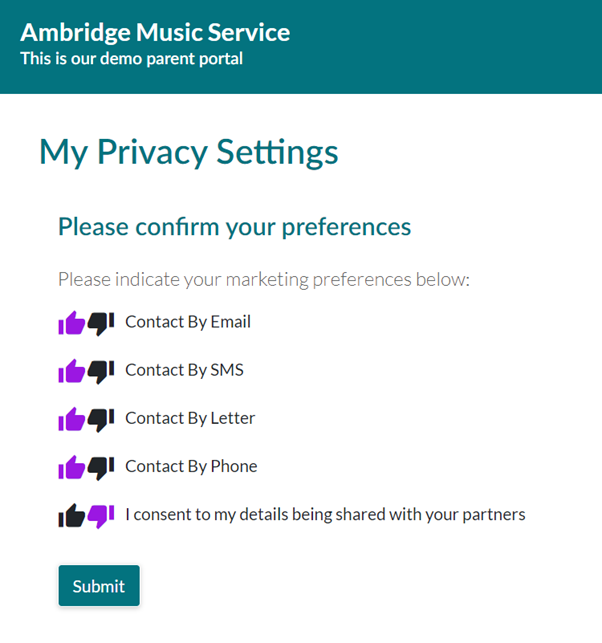
Request Consents. These will be asked as part of creating an account. Existing account holders can update their preferences once logged in by clicking the My Details meny, then Update My Privacy Settings. Please see the screenshot below for how this looks in the Portal.
Request Consent To Email Given - enable this option if you wish to ask any applicants if you can email them regarding the details defined in the Marketing Preference Text field.
Request Consent To Mail Given - set this to Yes if you wish to ask any applicants if you can write to them regarding the details defined in the Marketing Preference Text field.
Request Consent To Phone Given - set this to Yes if you wish to ask any applicants if you can phone them regarding the details defined in the Marketing Preference Text field.
Request Consent To Share To Partners - select this option if you wish to ask any applicants if you can share their information with relevant partners. For example, someone may have applied for drumming tuition and you have no space, but your partner organisation does. If this option is ticked, the applicant is giving permission for you to share their details for this purpose.
Marketing Preference Text - specify what you would like to appear on the portal when the applicant comes to the GDPR page of the process. For example, Please indicate your marketing preferences below.
How this looks in the Portal:
Customers can consent using the 👍option, or can reject using the 👎option.
Pupil Settings
The next lot of settings are around the information you collect on pupils. See below for an explanation of each one.
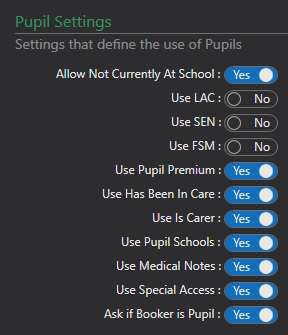
Allow Not Currently At School - turn this on if you want the option Not currently At School to show in the list of schools that an applicant has to select from when Use Pupil Schools is enabled - see below.
Use LAC - enabling this means the Portal will ask if the pupil is a looked after child.
Use SEN - by turning this on, the Portal will ask the pupil if they have any Special Educational Needs.
Use FSM - set this to yes if you want to record if a pupil is in receipt of Free School Meals or not.
Use Pupil Premium - setting this to yes will ask if the pupil is a Pupil Premium pupil.
Use Has Been In Care - turning this on will ask your pupils if they have been in care.
Use Is Carer - enabling this option will mean the Portal will ask if the pupil is a young carer.
Use Pupil Schools - if this is turned on the system will ask what school the pupil currently attends.
Use School Year: Enable this to include the pupil's school year on the Pupil's Details tab
Use Medical Notes - if you wish to record pupil medical notes, enable this option. You can set up the information around this here.
Use Special Access - select this if you wish to record any Special Access Requirements. For example, Wheel chair access.
Ask If Booker Is Pupil - if this is turned on, when an application is being filled out it will ask if the person making the booking is also the pupil.
Teacher Pay
Next is Teacher Pay and Contracts Settings.

Use Teacher Contracts - If you select to use teacher contracts then you can set up various contracts, and assign them to a teacher record and on a teacher's activity. You can assign multiple contracts on a teacher contract record. You can see how to set up the Teacher Contracts here , and see how to assign them to teachers here.
Use Teacher Break Allowance -
Use Teacher Travel Allowance - Next is how teacher travel is calculated based on where it goes to and from.
Manage Pay Claims - Enable this if you wish to manage the Teacher Pay Claims process through Xperios & the Portal.
Pay Claim Include Months - this is how many moths previous a teacher can claim for
Show Income On Pay Claim - when enabled, this will show the income for each lesson based on what the parent or school is paying.
Current Pay Claim Period Ends - This is where you set the end of each pay claim period and teachers can then claim up to that date.
School Settings
The last section is the Schools Settings.
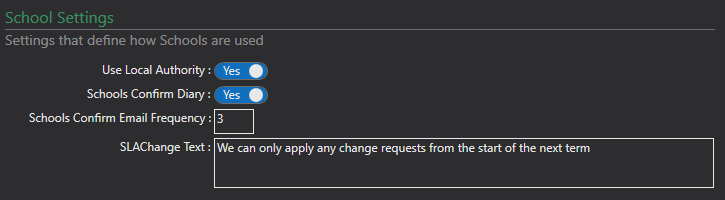
Use Local Authority - if turned on you can set up local authorities and assign them to your schools.
School Confirm Diary - if turned on, the schools will be able to confirm the work of the teachers in school billed lessons. This will allow them to assign a Task Result. When this option is enabled the below field appears:
Schools Confirm Email Frequency - this is how often in days the system will email the school to ask them to confirm the diary.
SLA Change Text - this is the text that appears on the SLA screen within the Schools Portal.
Delivery Settings
You can enable a delivery charge on your resources. This is done on the resource charge itself. If you have this enabled you can set the text that will appear on the portal here.

which appears like this