Account
Next, is the Account option, the menu shown here.
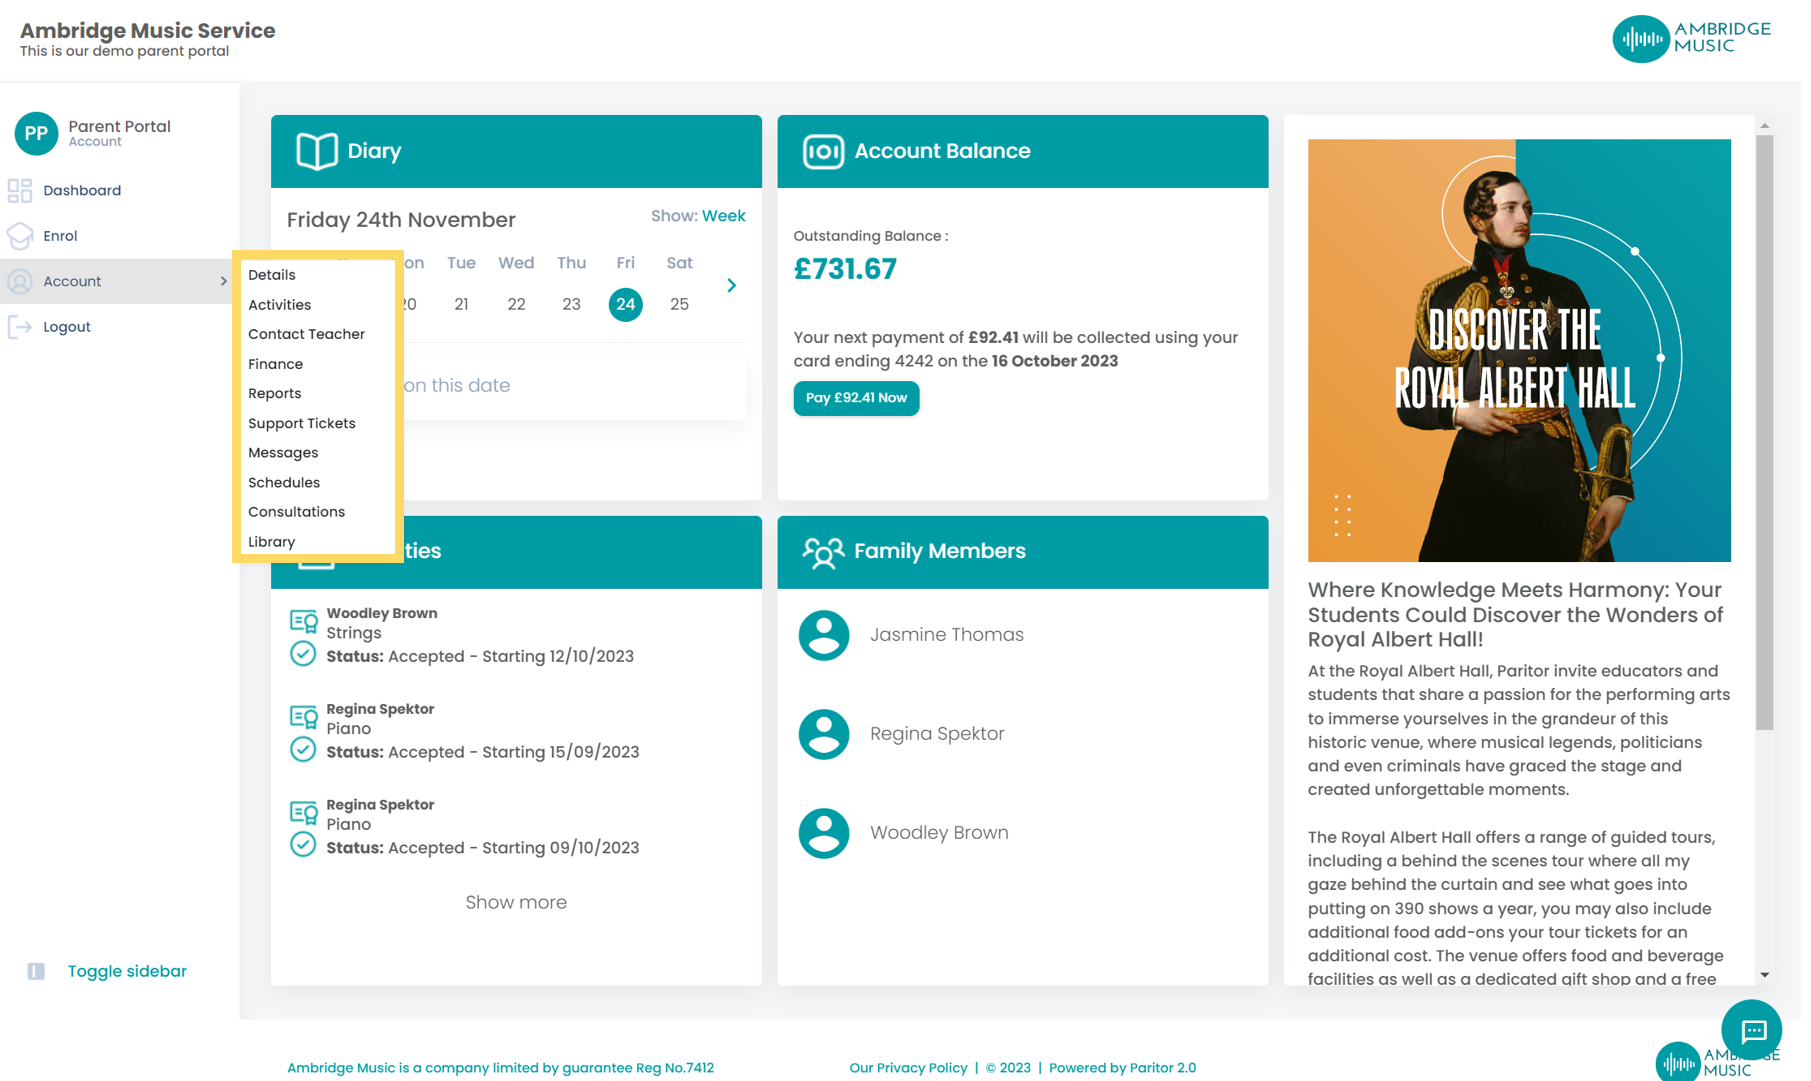
Details
Details will take you to your Family Details screen as shown below.

Here users can view and amend details for themselves and any pupils they have booked onto tuition. Under the Details tab customers are also able to change their sign in details and alter privacy consent questions. To change your language options go to Details, and then select Update under your name. Then scroll down to the bottom of the page and select the language that you want to view the portal in, from the drop-down list. Once you have selected the language use the proceed button to save.
Activities
Under Activities, you will see all of the current activities your pupils are in, and any existing applications.

Activities shows an icon per pupil, per activity. In the top right of each icon you can see the activity type (Tuition, Group, and Hire).
If your system is set up to require evidence for remissions, customers can view the submitted evidence here.
Customers can also make a request to withdraw from the activity on this screen. This will send a notification to the admin team who can either approve or reject with feedback.
If you have offered a place to the pupil this will appear here also. The customer can click Accept offer and make payment and they will then appear under the Activity heading instead of Applications.
Contact Teacher
Through the Portal, parents can communicate directly with the teachers where needed. There are two options on the Contact Teacher Screen.
Notify of Absence
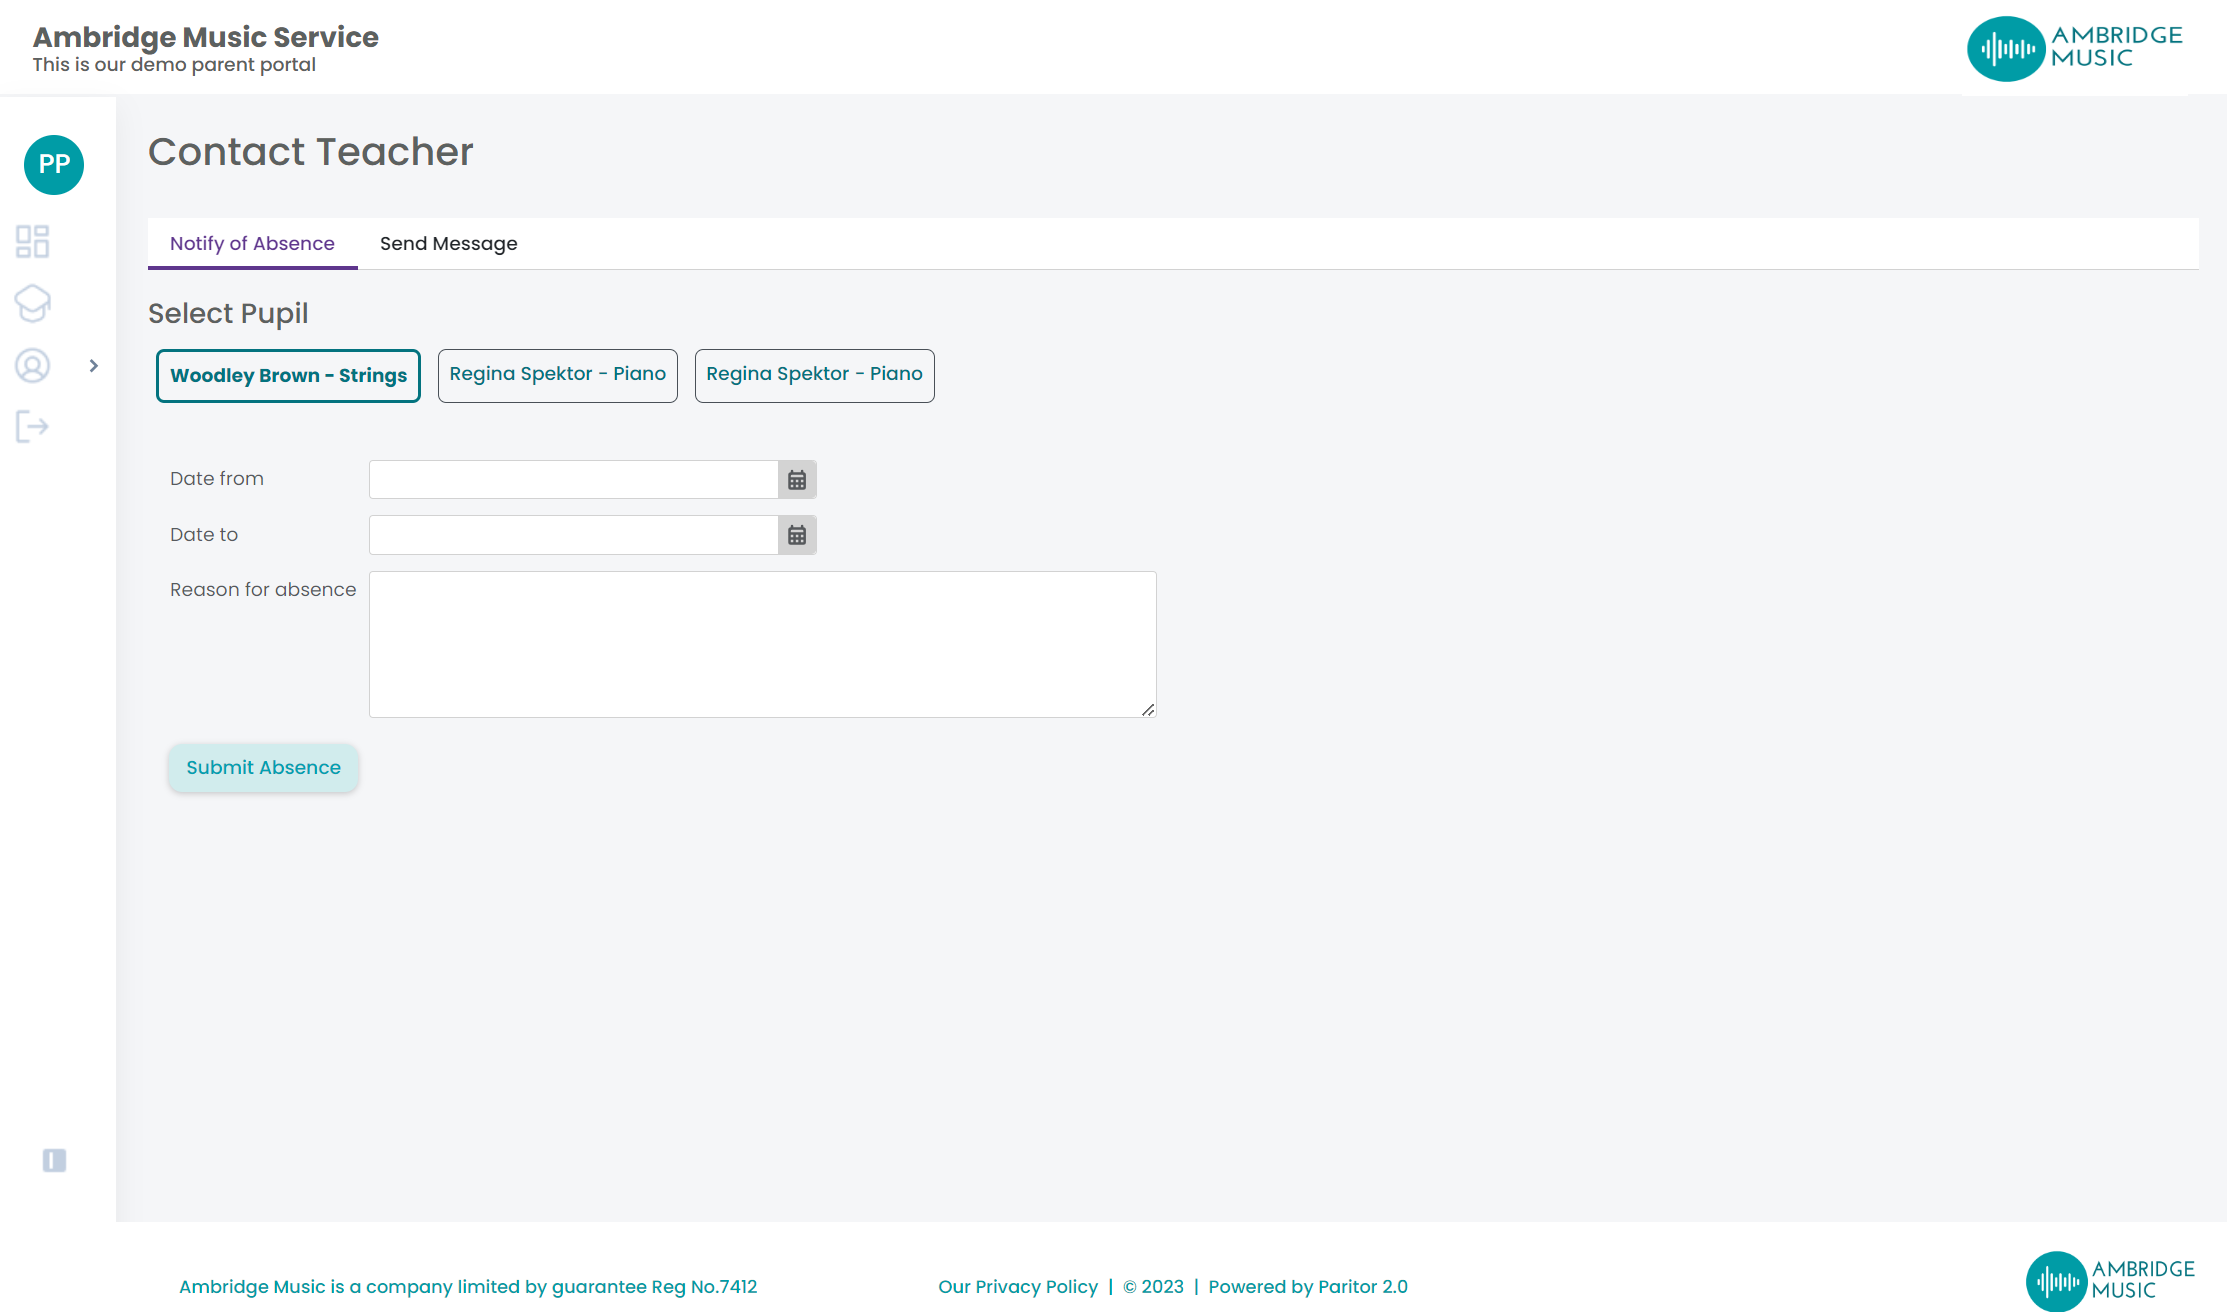
Using the Notify of Absence option, parents can do just this. They can select the pupil they need to send the update about, then enter the following information.
Date from - customers can use the calendar icon to select the date the pupil will not be attending from.
Date to - customers can use the calendar icon here to select the date the pupil will be absent until.
Reason for absence - here the parent enters the reason for absence using a free text field.
Once the above information is entered, they can press the Submit Absence button. This automatically creates an Action for the teacher. A secure message is created that they can access when they log in to their Portal. The register is updated with a reason as well.
Send Message
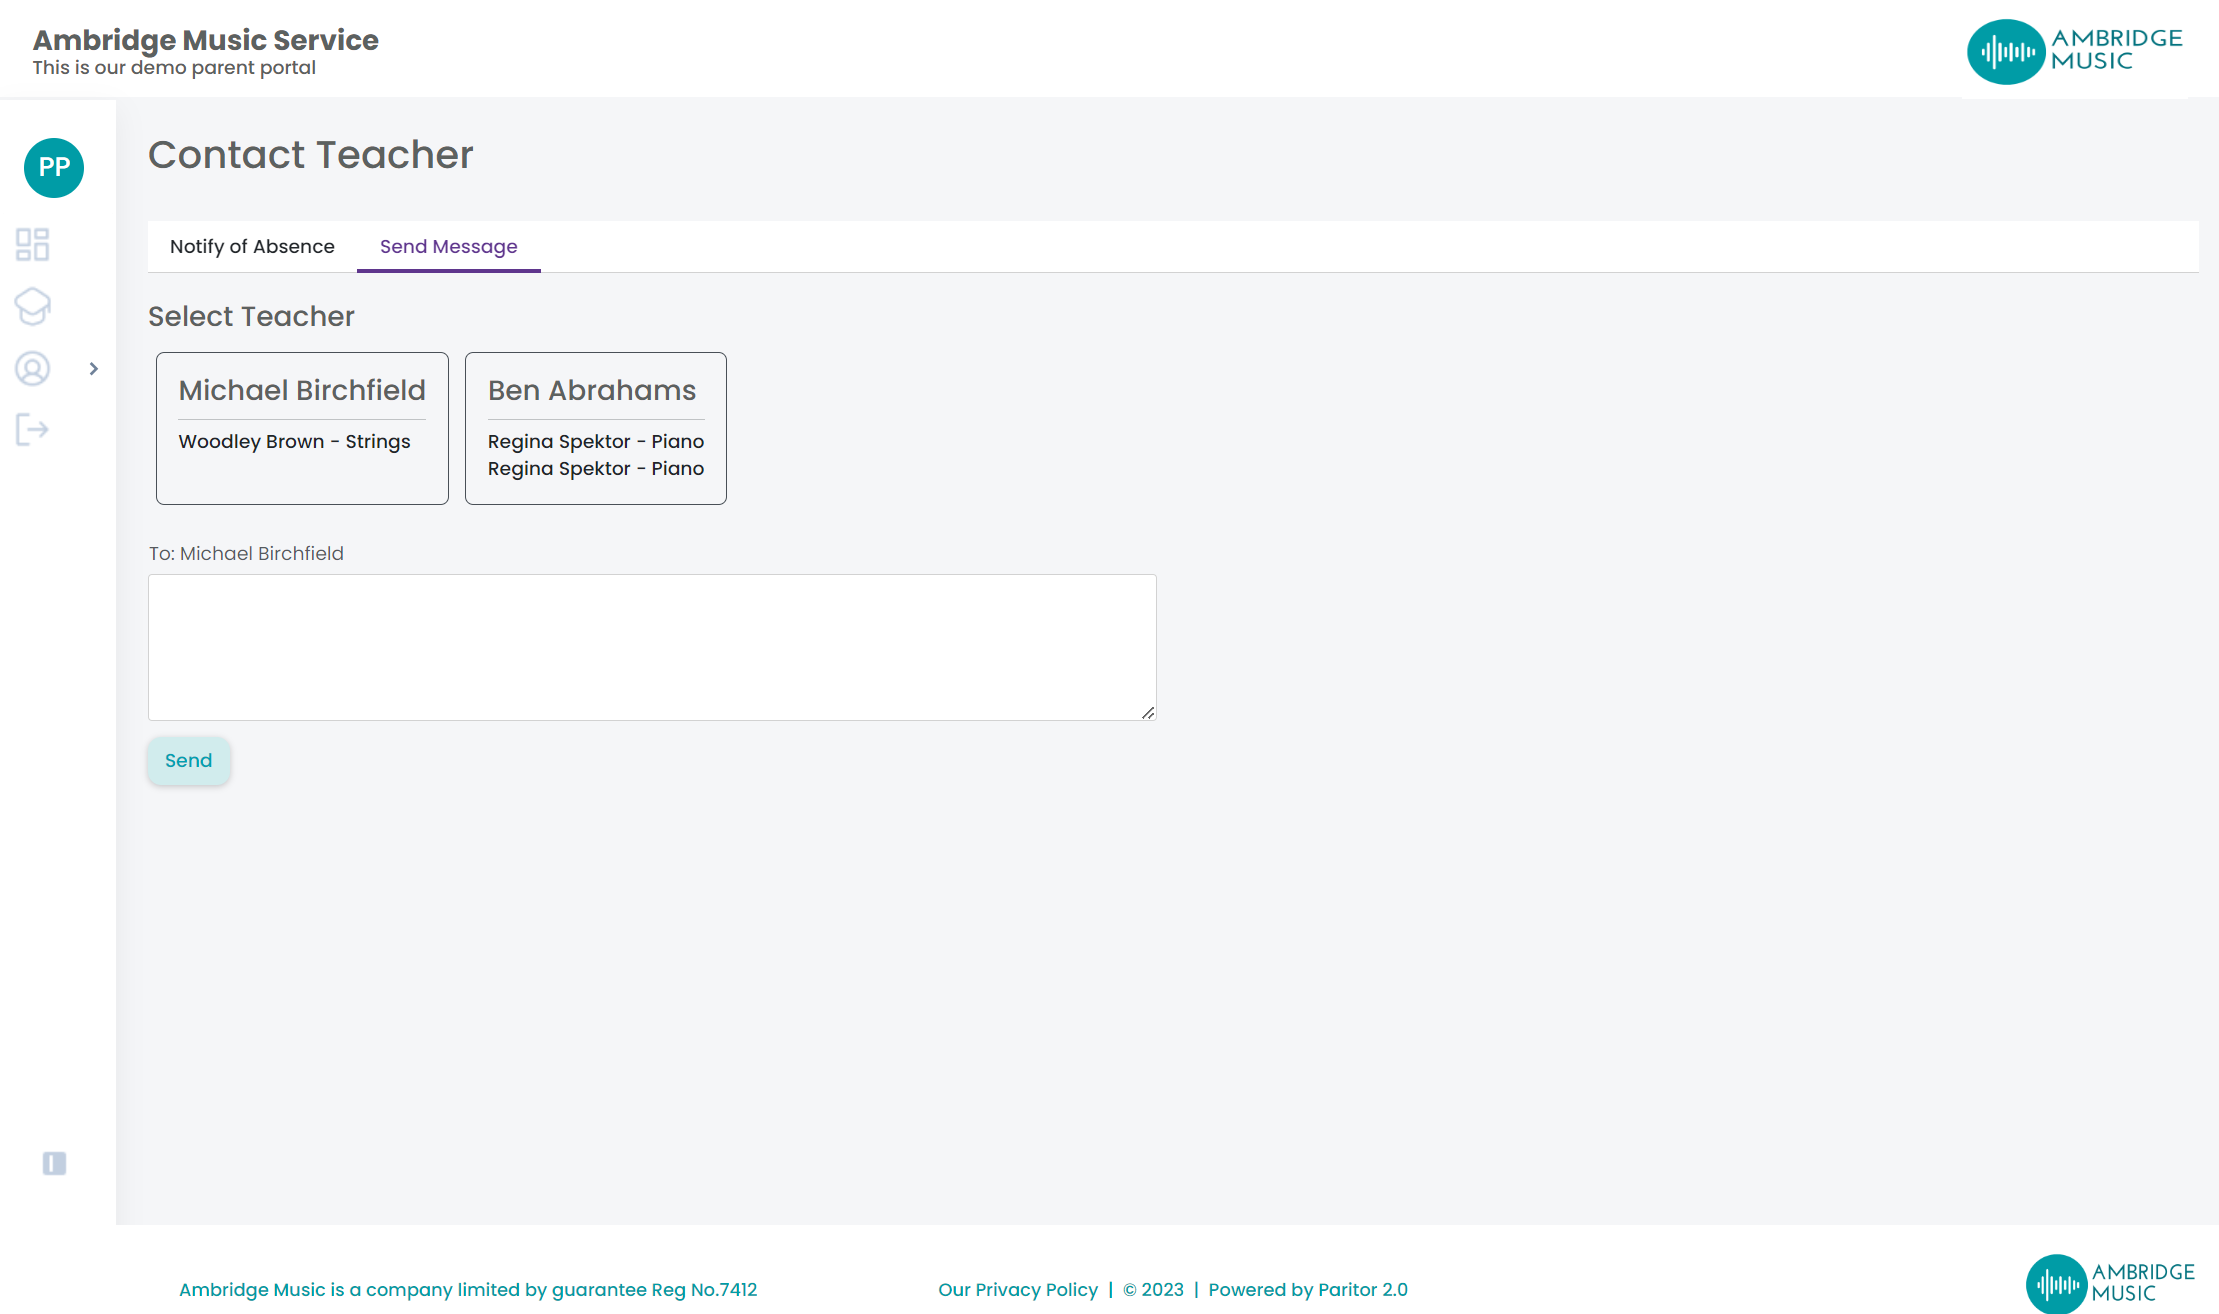
Using the Send Message, Parents can select the Teacher they wish to contact, then using the free text field, enter away. When ready they can then press Send. This automatically creates an Action for the teacher. A secure message is created that they can access when they log in to their Portal.
Finance
On the Finance screen, customers can view their finances.

By default this screen shows the Outstanding Invoices Only option. Customers can also view the Full History by clicking on this option at the top of the screen.
On the left of the screen there is a breakdown of the invoices with their dates, description, a Total, Paid value, and the Outstanding Balance.
There is also the option to Print the invoice.
On the right hand side is an outline of the payment schedule that covers those invoices. This has the dates, the value for those instalments and a status to show if it's Pending, Failed, or Successful.
Customers can opt to change the schedule date by clicking the calendar and selecting a new day of the month that they would like the payment to be taken. This will update all future payment dates as well. Customers can also select to Pay Next Instalment early. For more information on Making Payments, see this section here.
Reports
Under the Reports section, Parents can view their pupils yearly (or termly) reports.
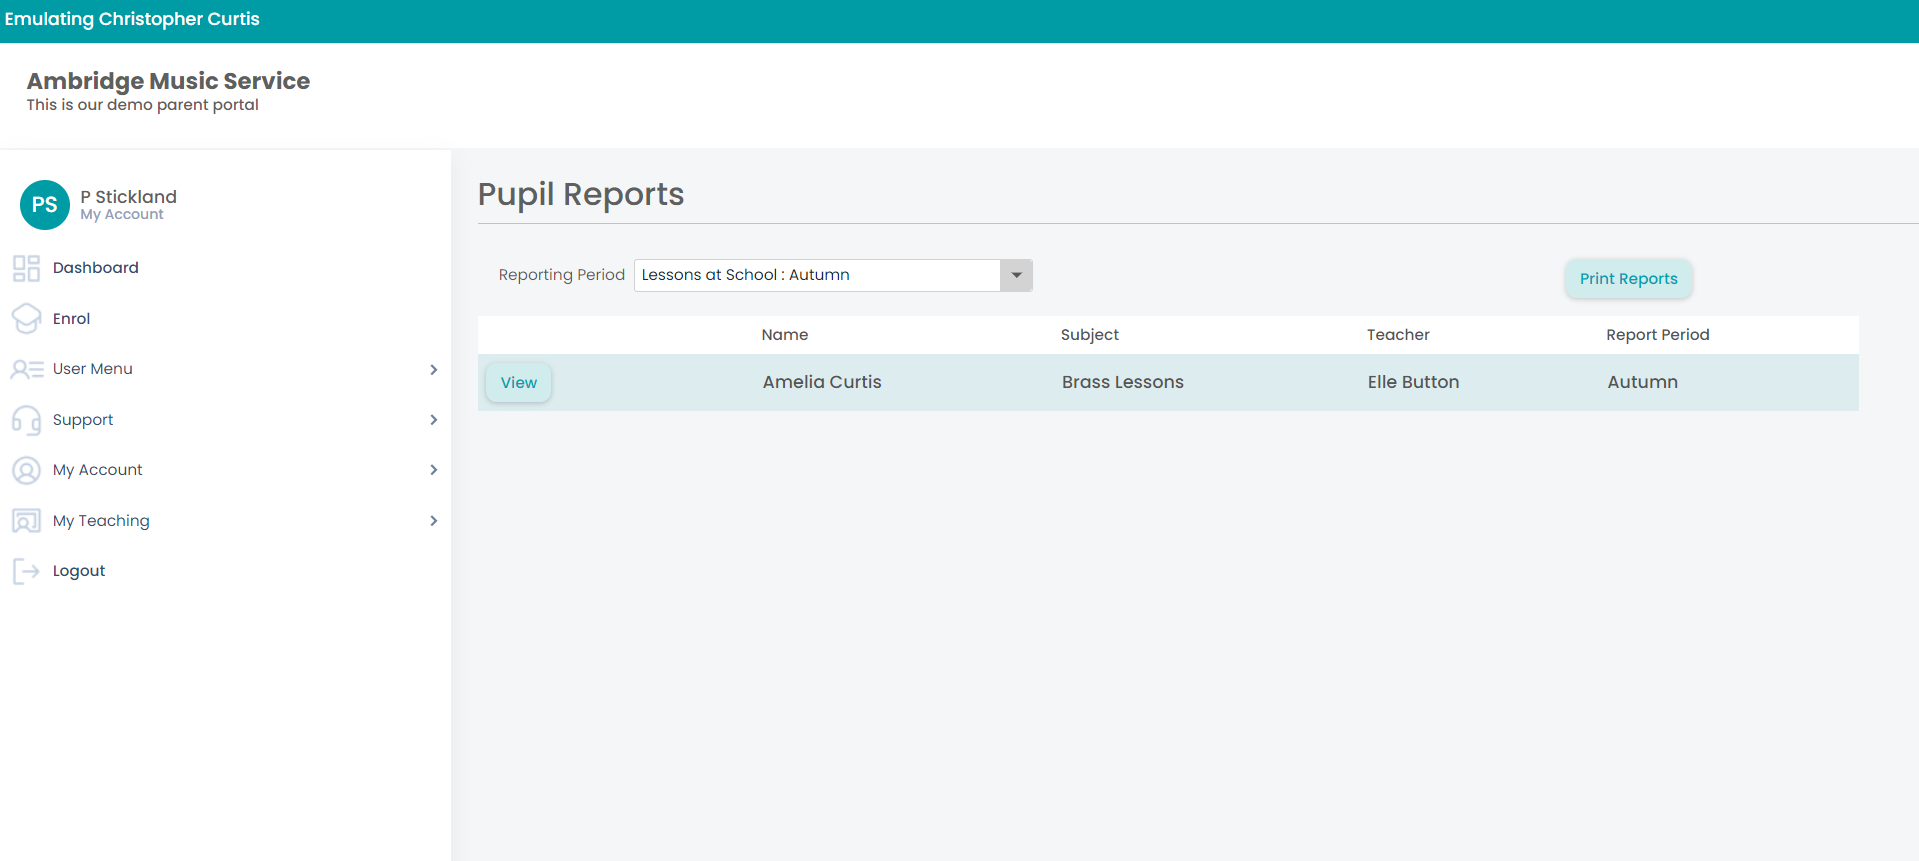
Upon clicking View, the report will appear on-screen like this:
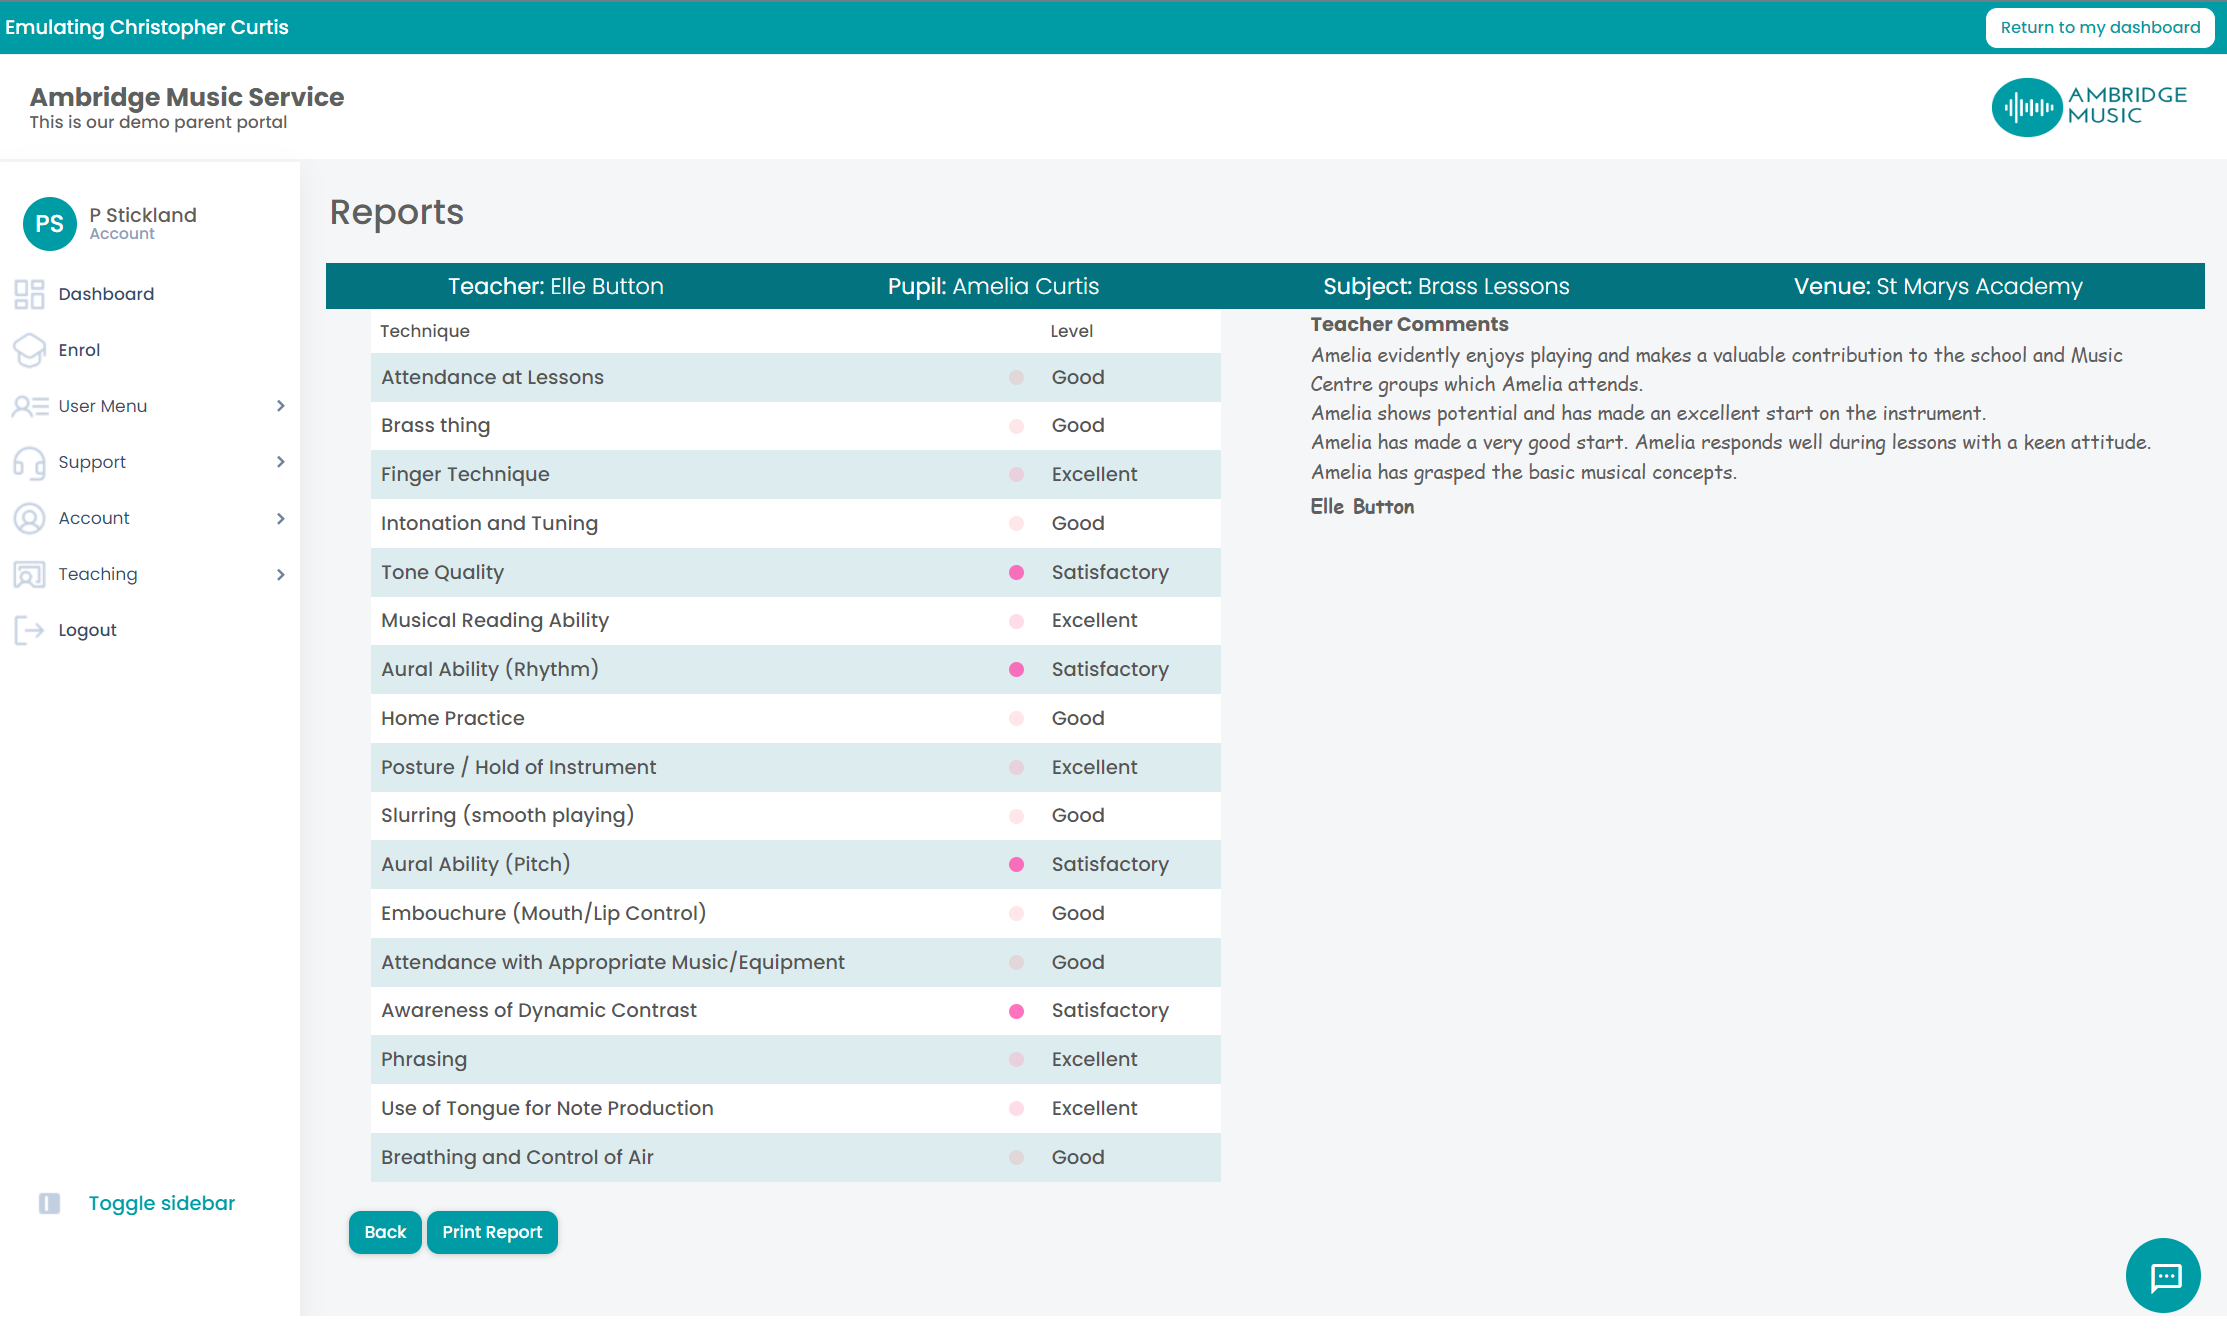
Across the top is a summary of the Teacher, Pupil, Lesson, and Venue.
On the left hand pane are the list of Techniques with the level the teacher has assessed the pupil to be performing at.
On the right hand pane are the Teacher comments the teacher has made about the pupil in this lesson.
To see how to set up your system for teacher to pupil reporting, see the Appraise section here.
Support Tickets
The Support Tickets section shows any outstanding and historical issues the customer has raised with your service.
Here they can create a new enquiry by clicking Add New Issue which will take them to the screen below.
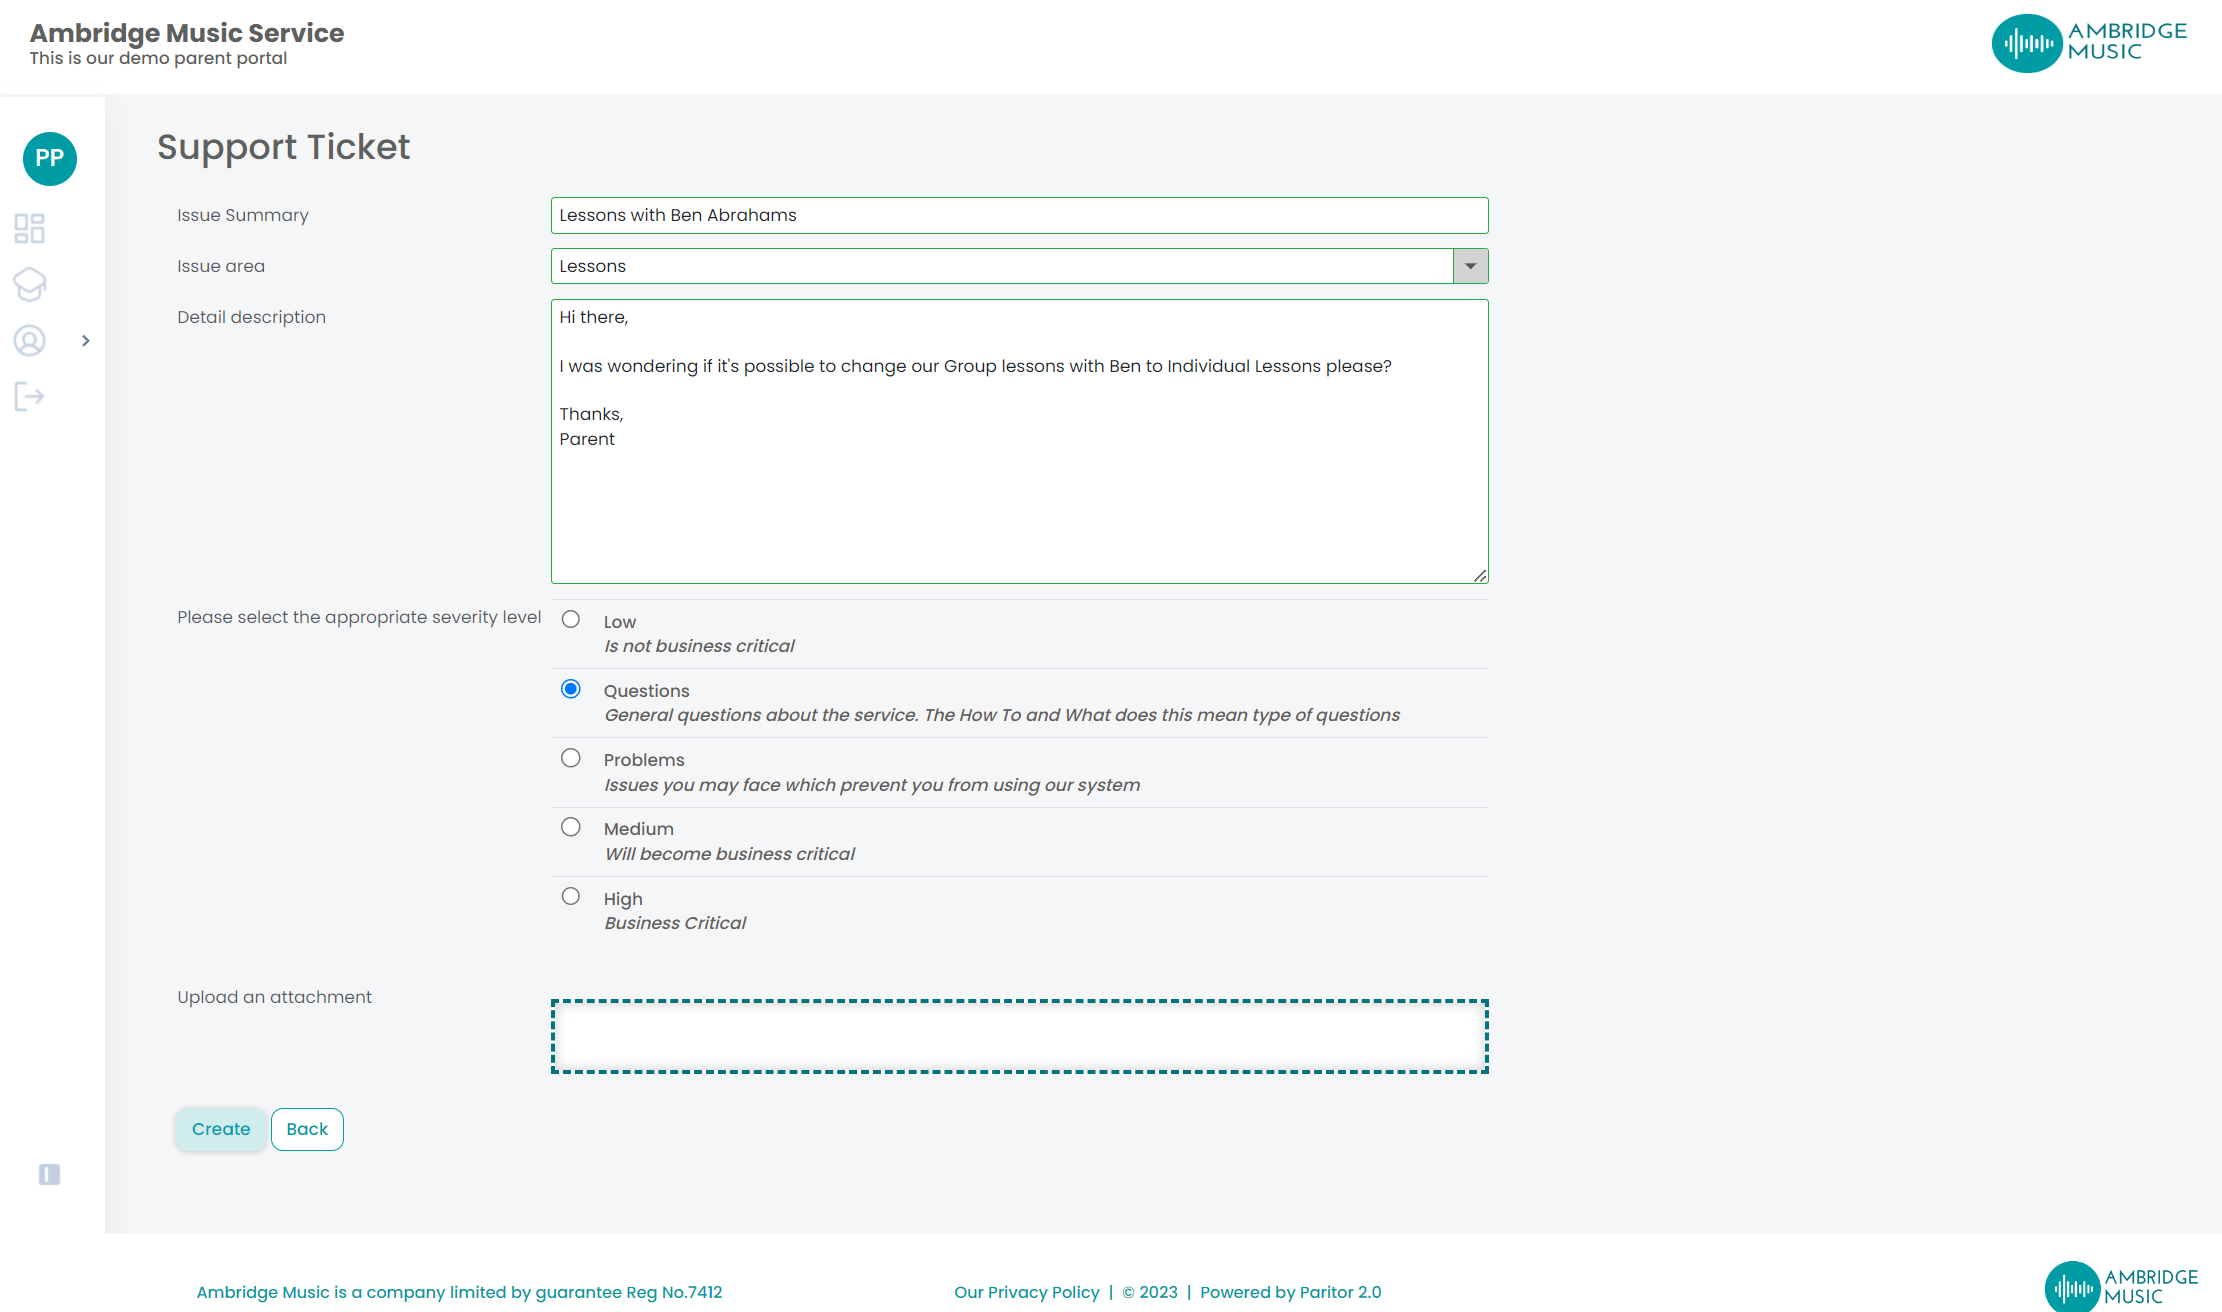
Issue Summary - enter a brief description of the issue/enquiry.
Issue Area - this displays a drop down list of the Issue Ares you've created in Xperios under the Rapport section of the Settings menu. You can find out how to do this here if you've not done so already.
Detail Description - your customer can enter the details about the issue or enquiry in this free text box. They can expand this field by dragging the bottom right corner.
Severity Level - this displays the severity levels that you have set up in Xperios under the Rapport section of the Settings menu.
Upload an attachment - customers can upload a screenshot if they need to of any issues.
Create/Back - to complete the enquiry customers can click Create. Or to cancel, click Back.
The ticket that has been created will now appear under the Support Tickets section.
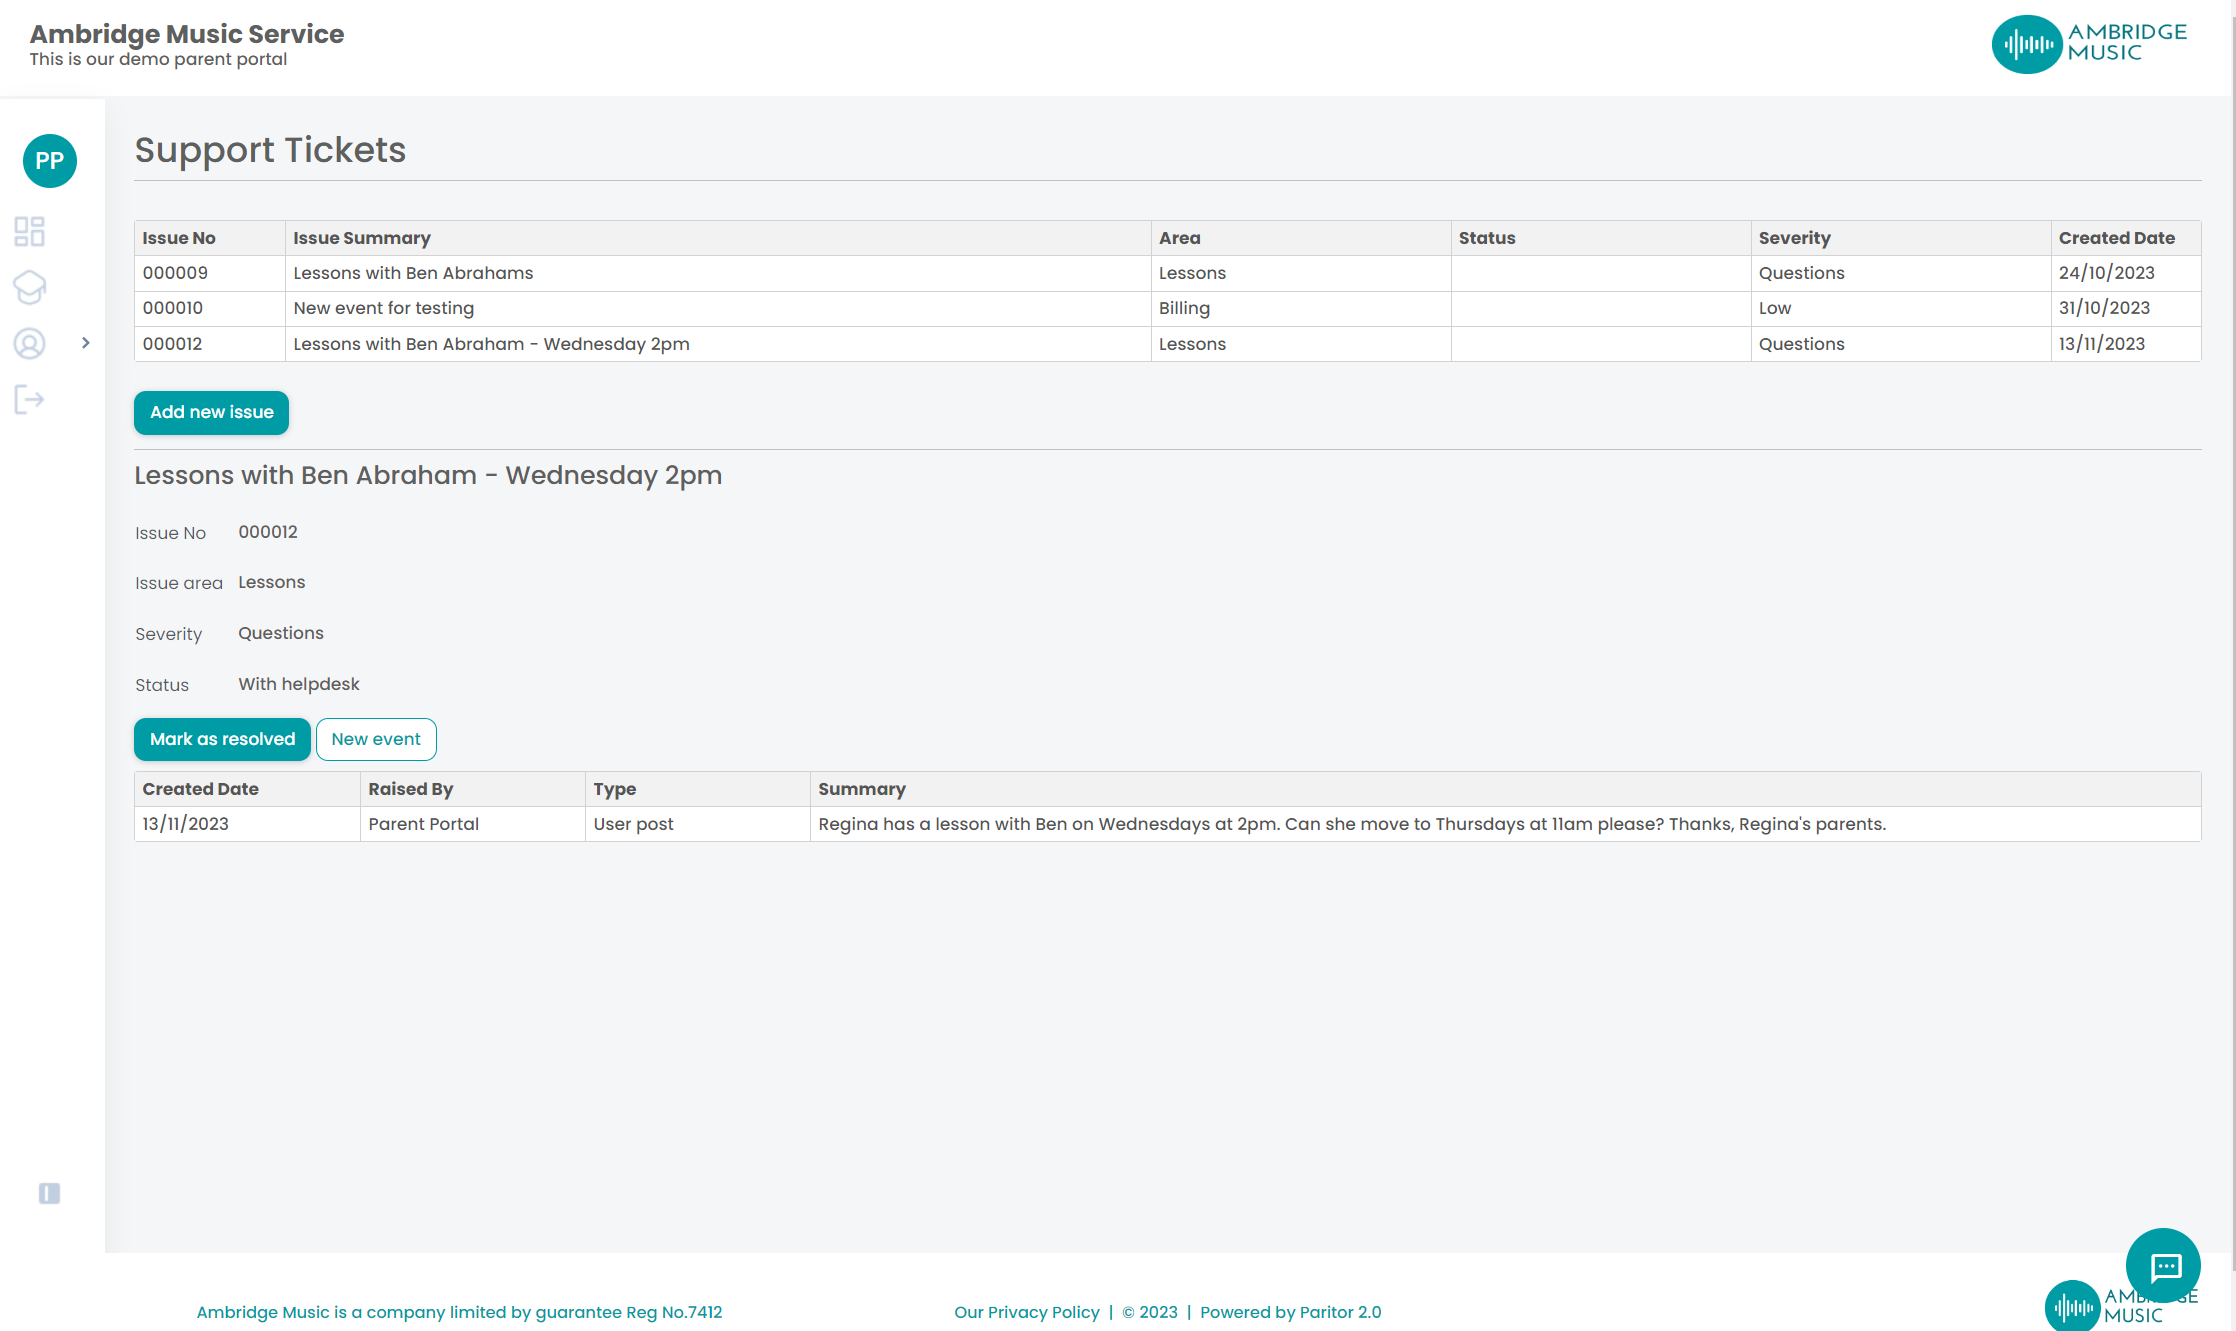
When an existing ticket is clicked on, a summary is displayed and the parent can either mark it as resolved, or add a new event - an update to the ticket. Any updates from your service to the customer will also show on this screen.
Any new tickets from your customers will appear under the Issue Tracker Menu within Xperios.
Messages
This is where customers can come to view previous secure messages that have been sent via the Portal.
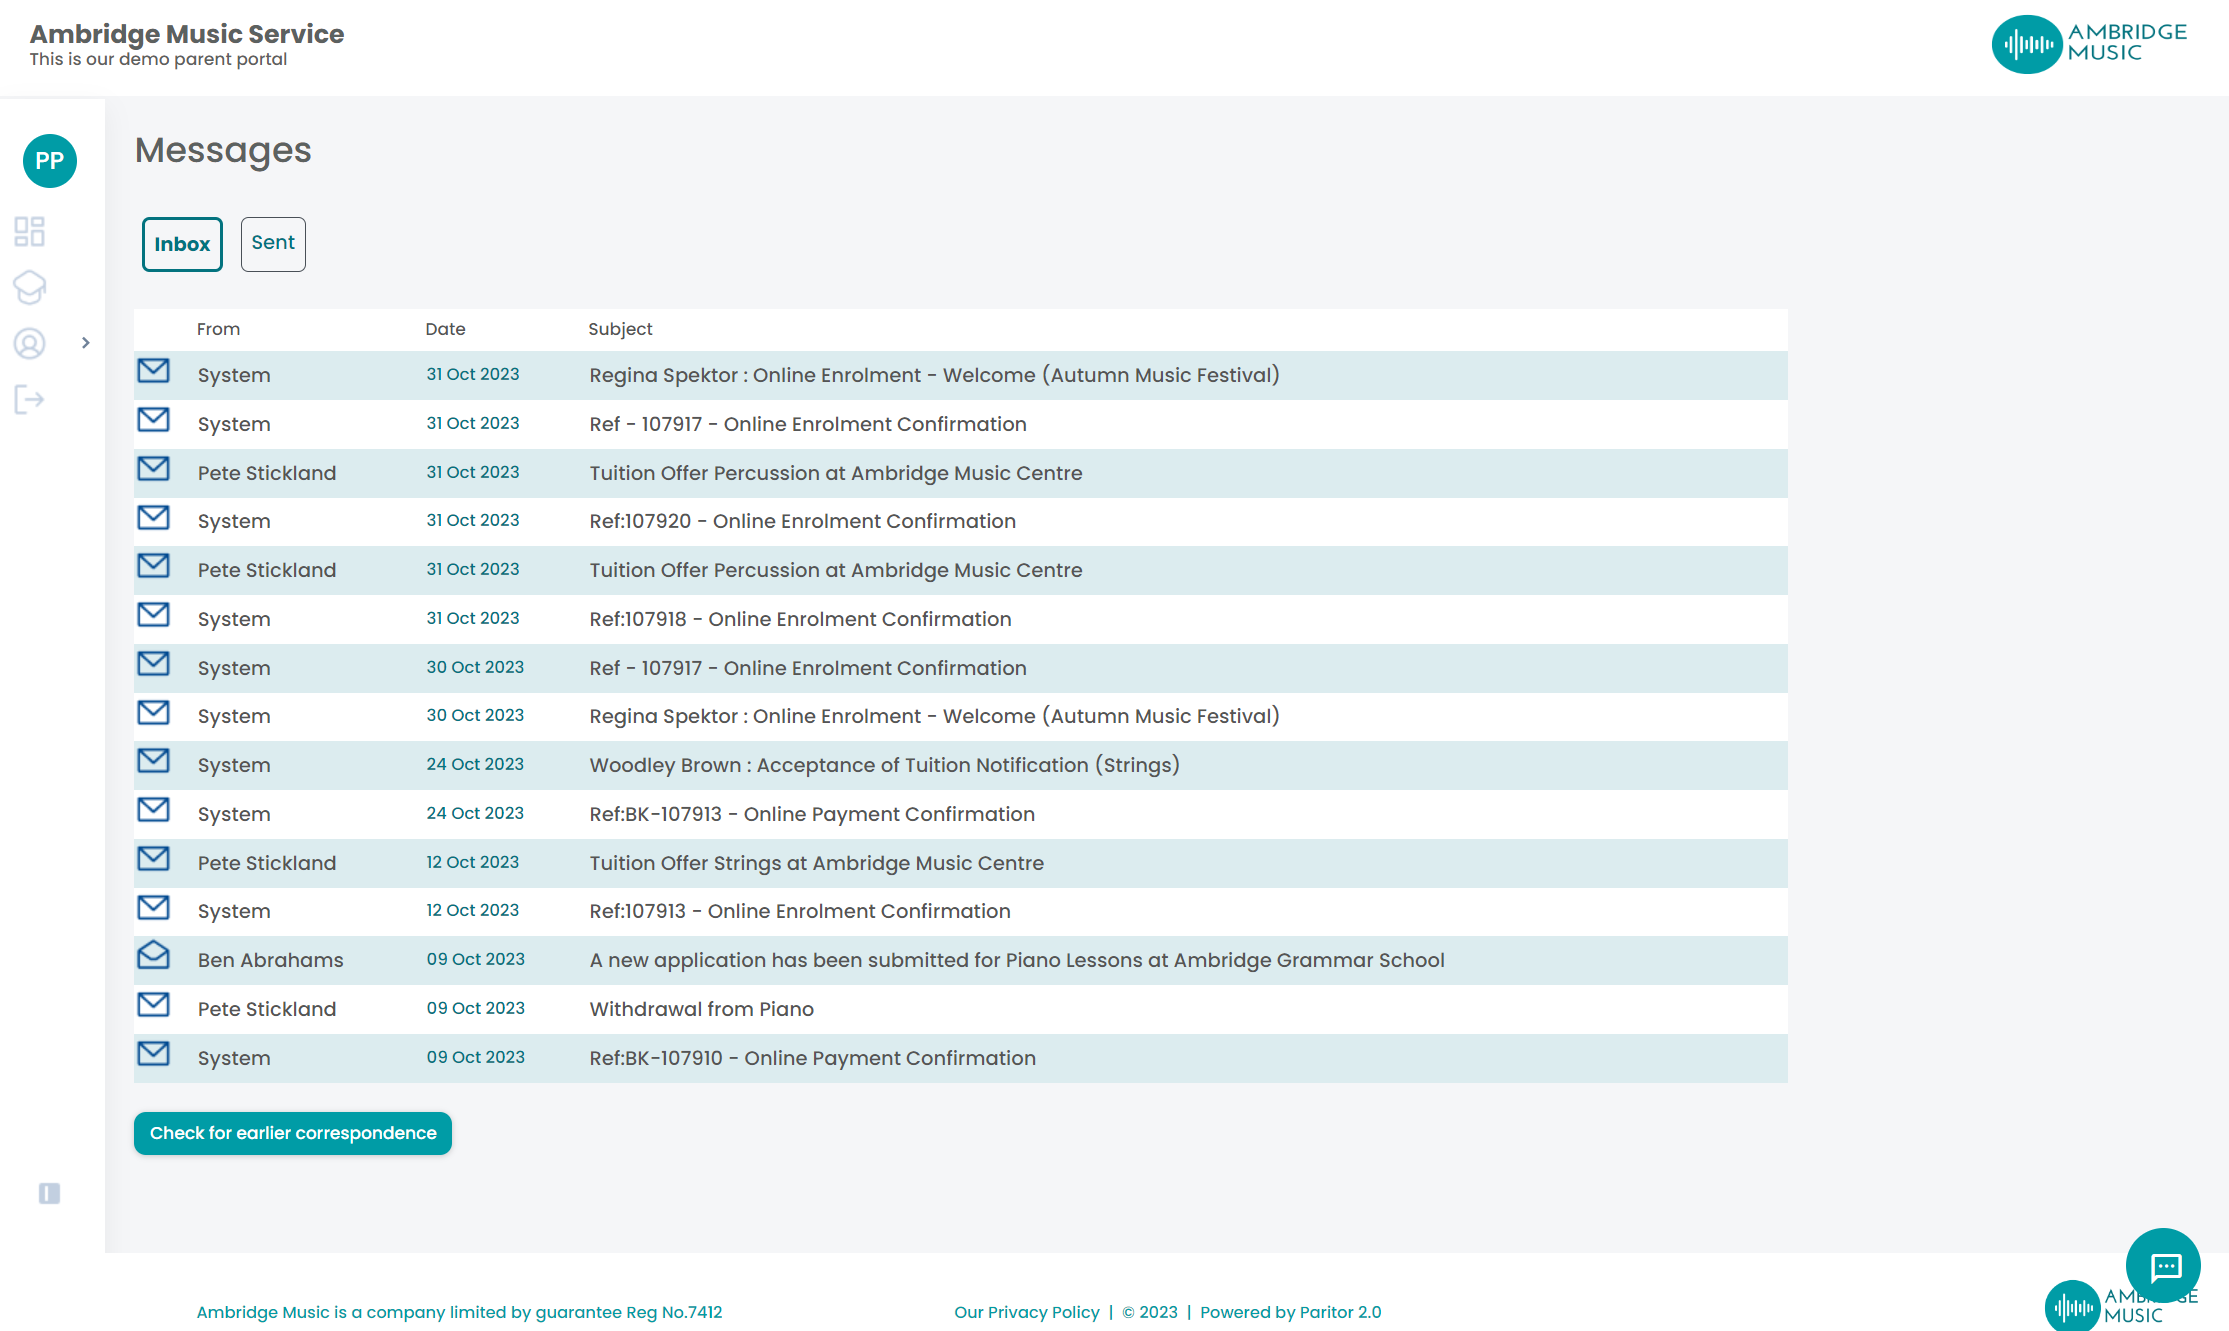
They can view their inbox and sent items.
Any new messages will be displayed on the Dashboard as an Action.
Schedules
Schedules is where parents and guardians can see what their children have on, the dates and the times.
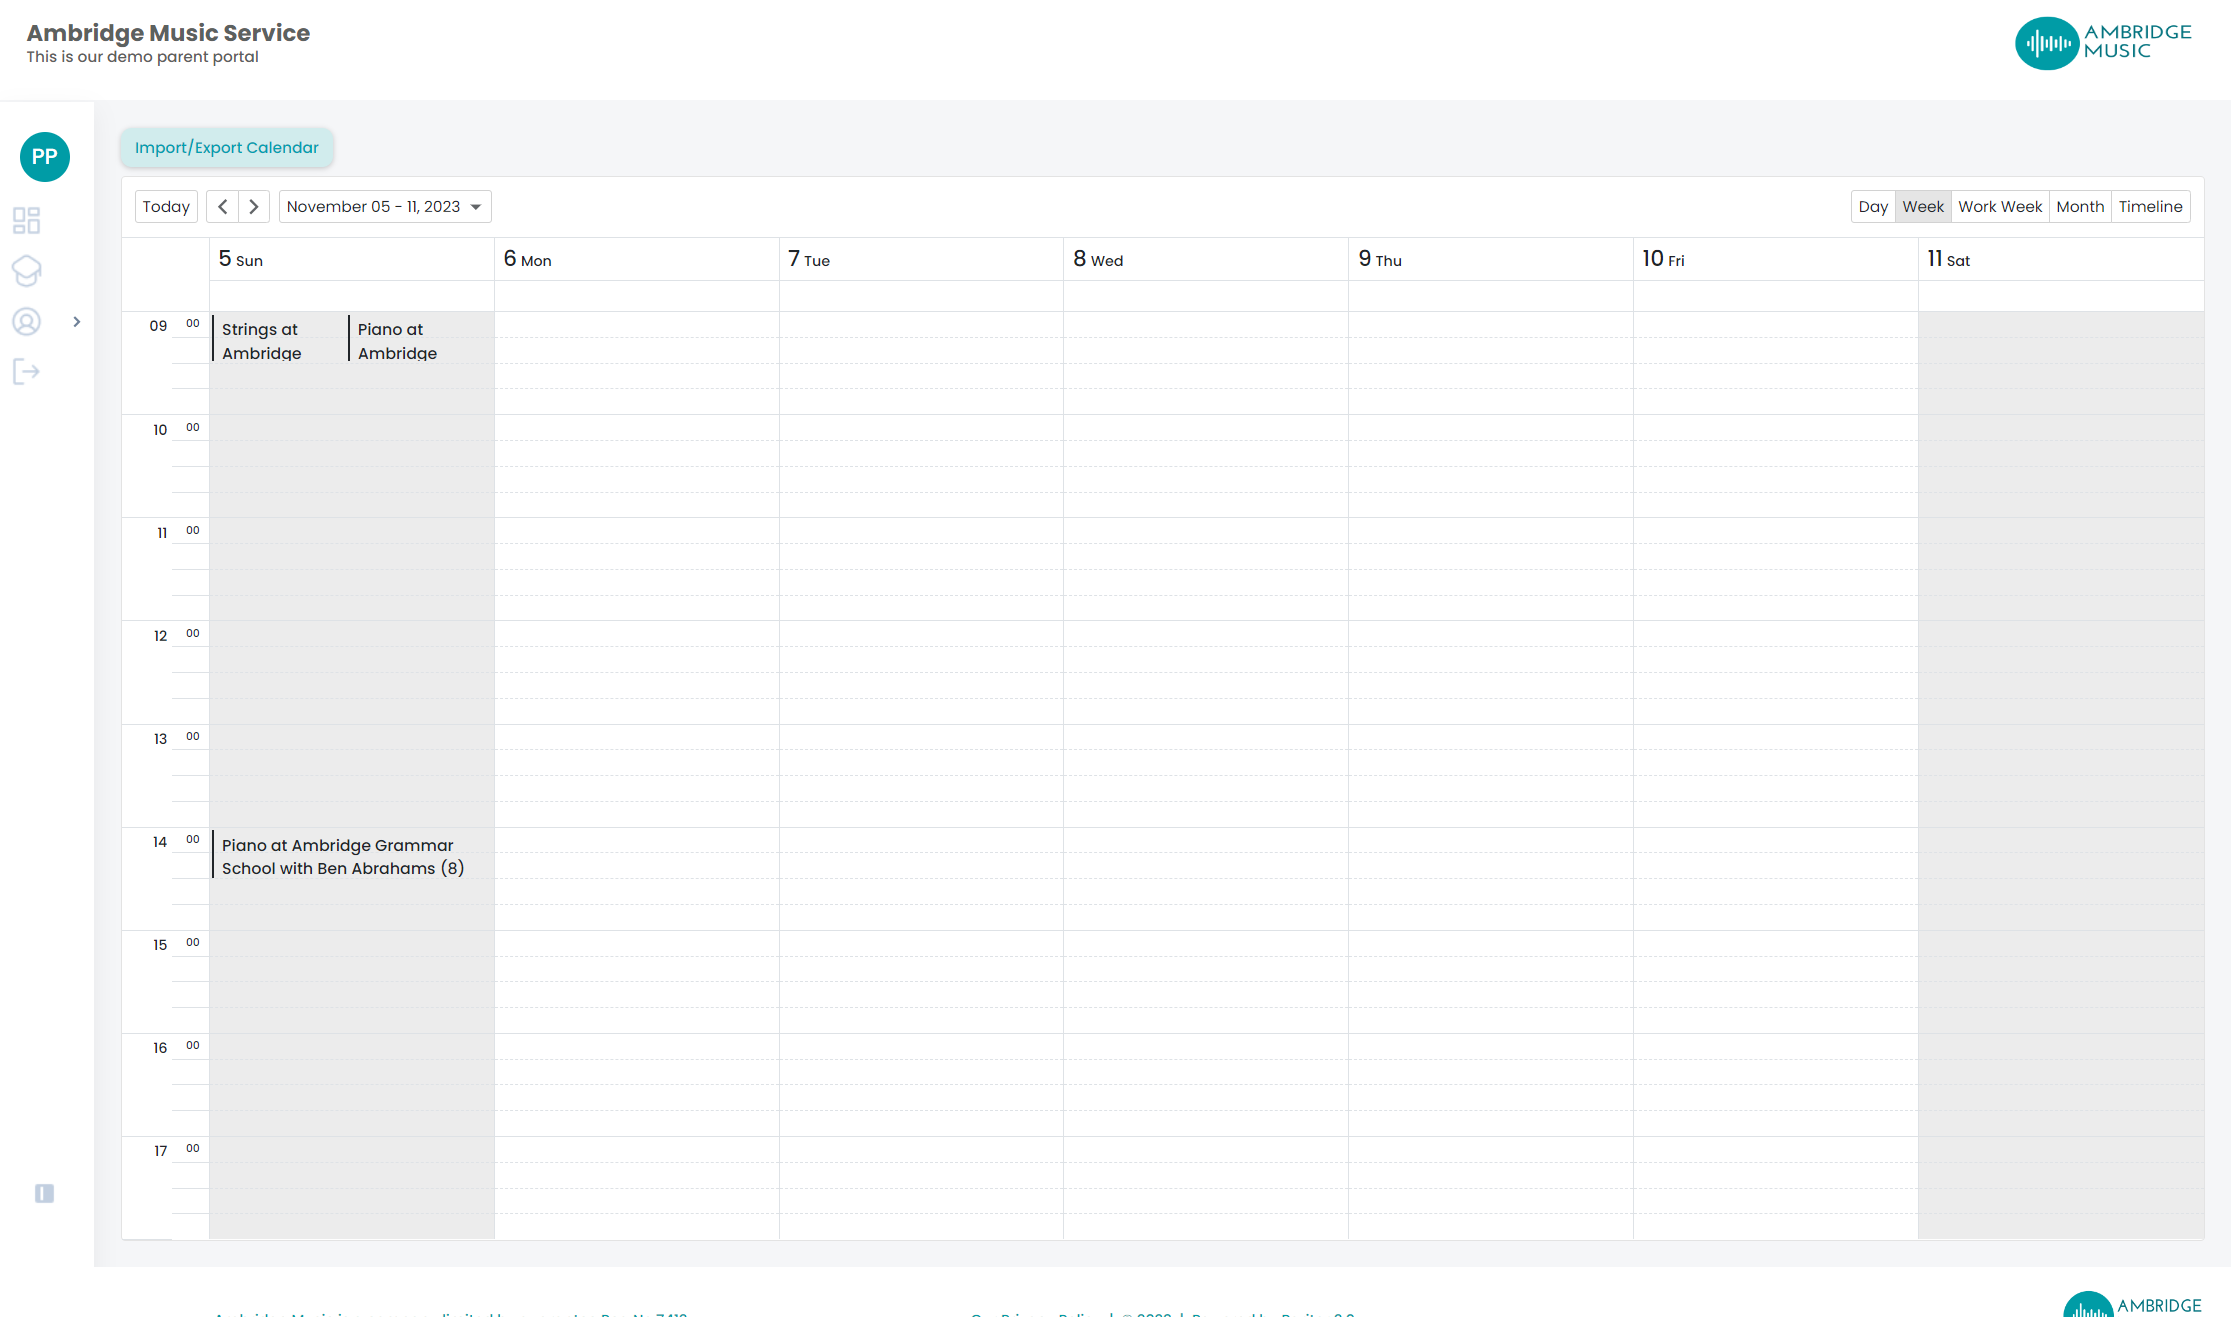
The system defaults to the current week and can be changed using the top left options. The Portal will show the Monday - Friday Work Week view, which can be changed using the options in the top right corner.

A single click on the lesson will show an Appointment Summary, stating the activity, venue, teacher, date and time. Clicking on Go To Lesson Dashboard will take you to that specific session which shows an attendance summary, and the option to contact the teacher.
Consultations
If your service is using Consultations for managing and running your online appointments such as Online Parents Evenings, an Action will first appear on the dashboard once the teacher has set their sessions up.
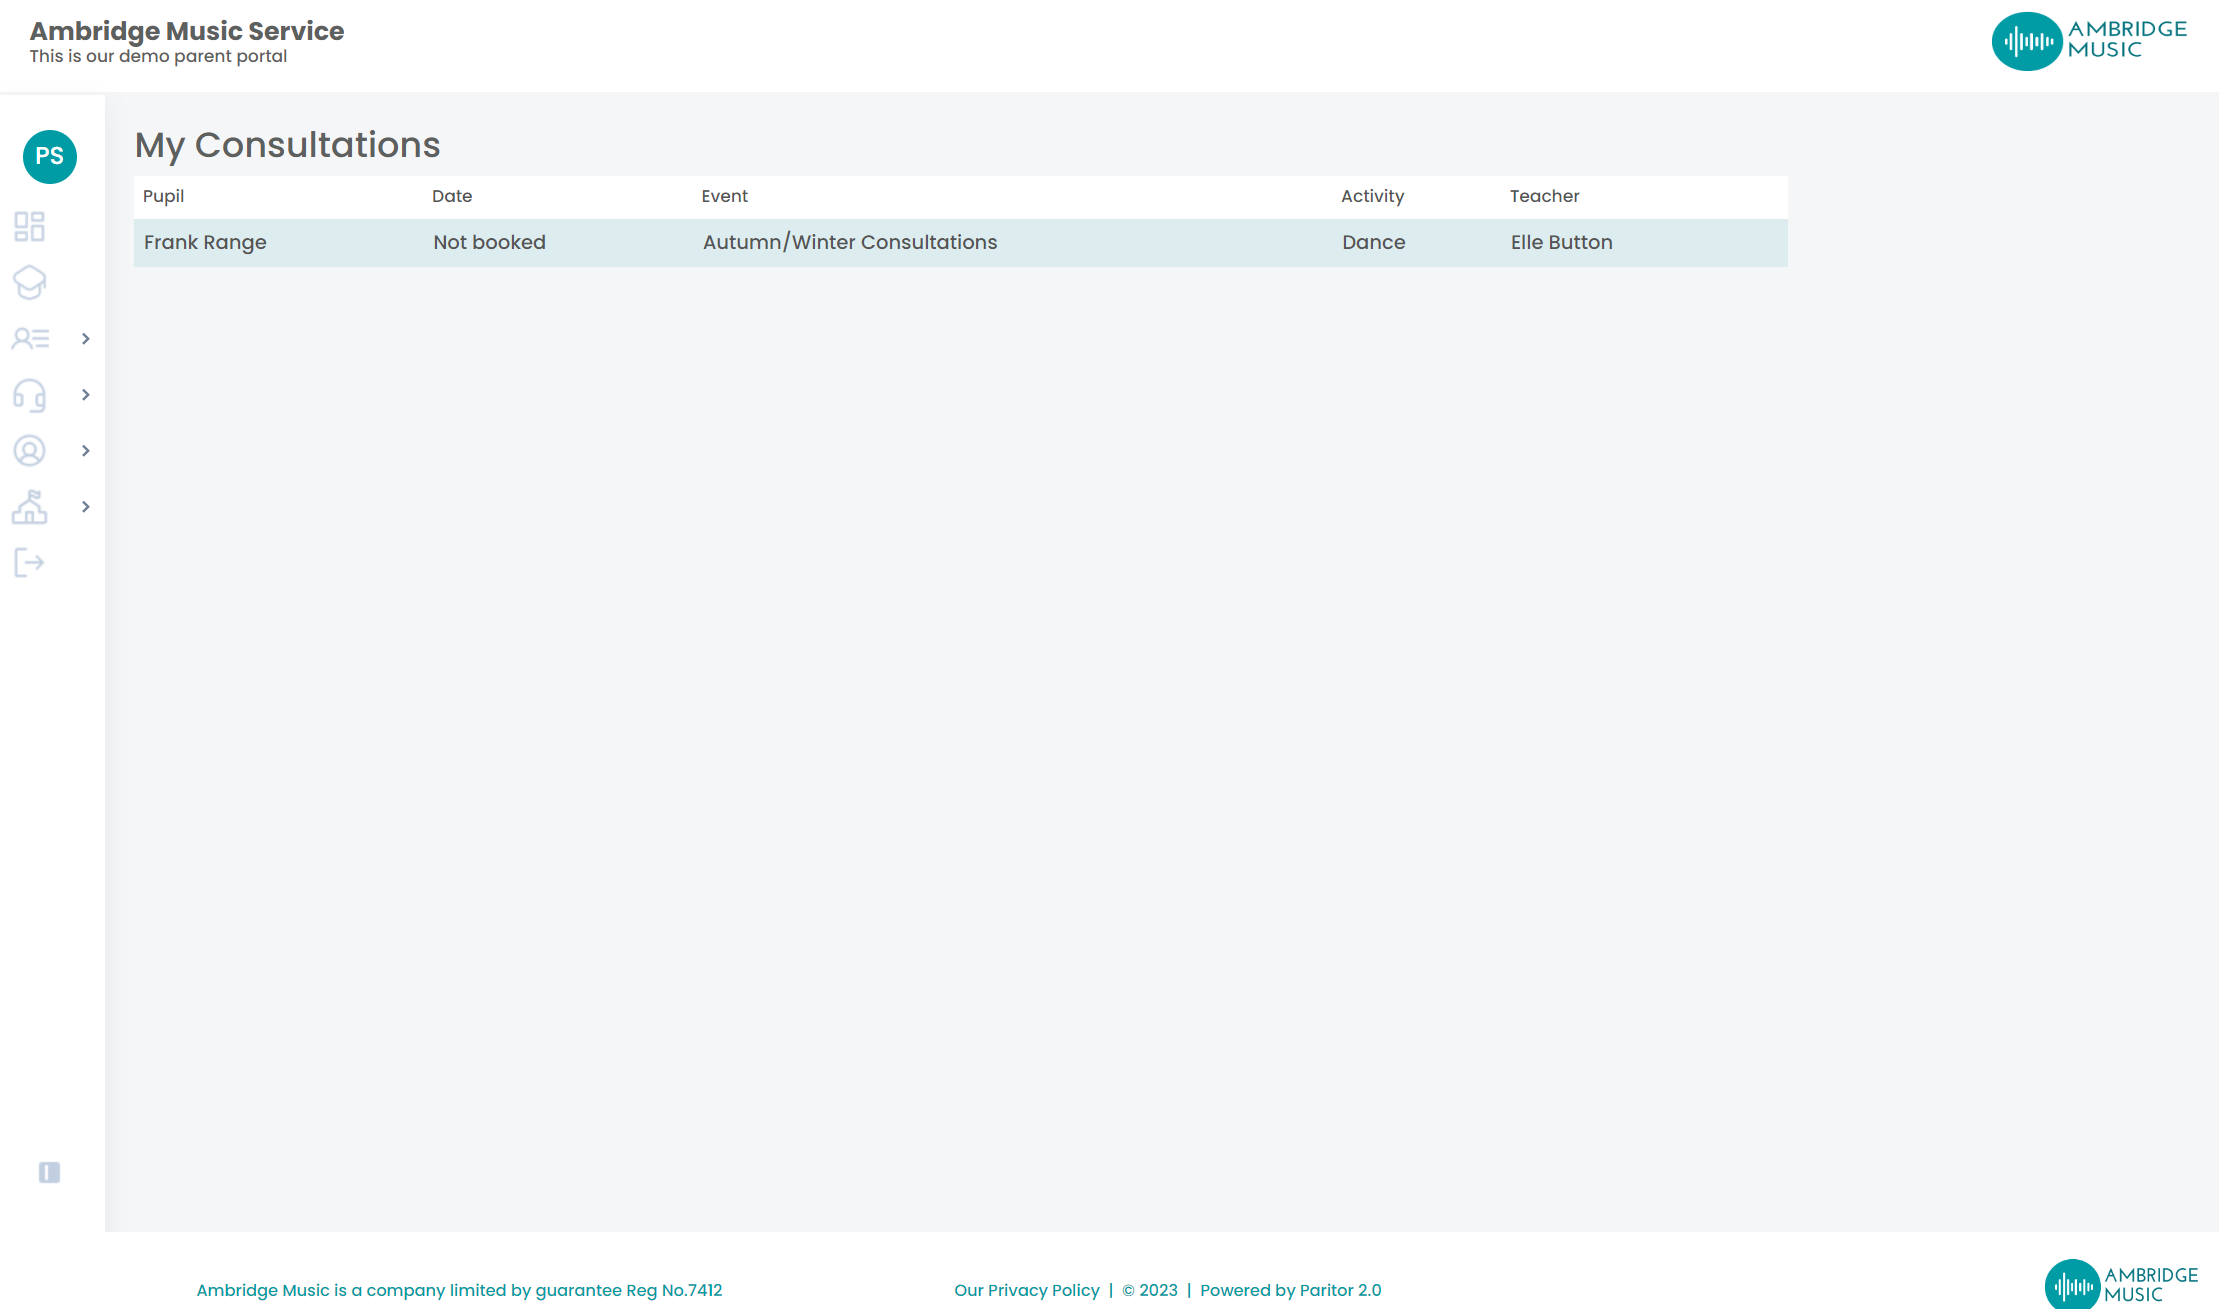
This will ask you to select a session. Once a session has been selected, this will appear in the Consultations section of the Account menu. This will show the available day, date, time, and teacher of the appointment.

Library
Each service can create their own library of documents that can appear on the Portal. This can be for Teachers and or Parents. For example, you may have a range of documents for your parents such as term dates, policy documents, forms etc. These will appear under this menu if you choose to set these up. You can click here to see how to set this up.
Switch Service
The Switch Service option will only appear for anyone who is associated with more than one organisation. This is where you can switch between organisations. You will need to have the same login details for both organisations, and make sure that you are associated with both through the same email. For more information on associating accounts with organisations click here.