Adding an Activity
 To add a new activity, find the school, centre or teacher that you wish to create an activity for and select the School/Centre tab. Select the Activity tab and click the icon shown here.
You should find it at the bottom of the screen. A display like the example shown above should now appear.
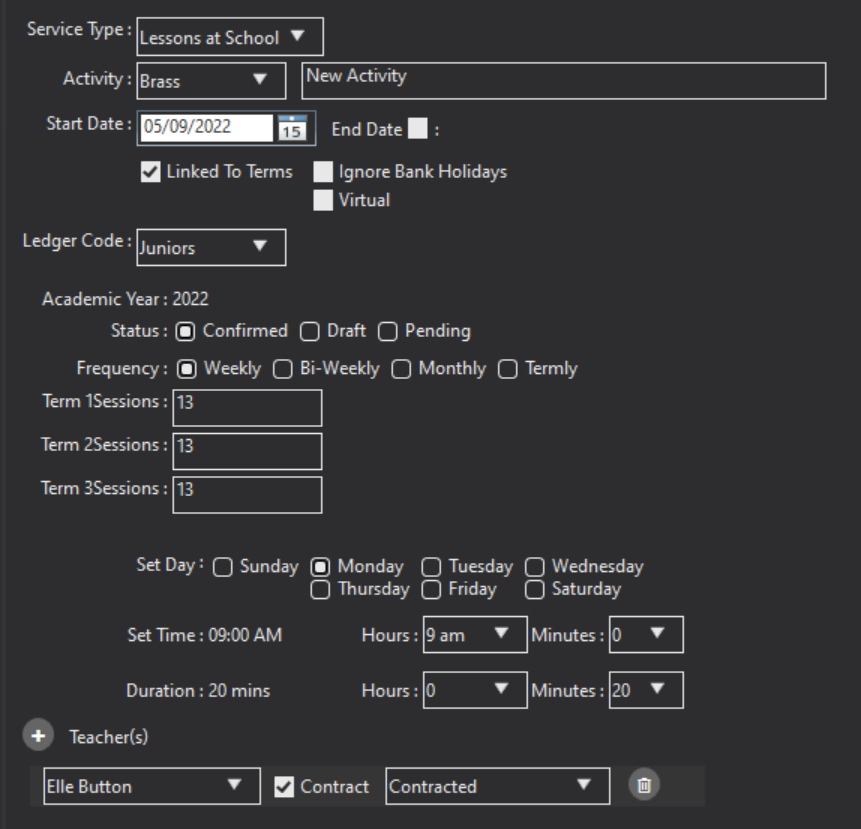
First, select the Service Type that it is linked to. Service Types can be set up in your System Settings. See Service Types for more information on how to do this.
Next is the option to assign an Activity. These are set up in your System Settings. For more information, please see Activities.
The Activity text box is intended for the addition of an activity title. This will be displayed on the calendar view.
The Start Date is the date of when the activity starts, and End Date is optional and is only required if necessary.
The Linked to Terms option, if ticked, will set up the lessons according to how your terms run and their Start and End date. If unticked, then the activity will run continuously for the number of sessions that you specify.
Ignore Bank Holidays means that the activity will still run even on a bank holiday.
The Virtual option allows you to state if the lesson takes place virtually or not.
You then need to assign a Ledger Code to the activity. Your ledger codes can be set up in System Settings. See Ledger Codes for information on how to do this.
The following fields is used for defining in the schedule of the activity.
First, select a Status. “Confirmed” means the activity will start as soon as it is saved (depending on the Start Date), “Draft” saves the creation of your activity without finalizing it, and “Pending” signifies an activity that is complete but is not ready to start yet.
Frequency is how often the activity runs. The system will determine the dates between which the activity runs depending on the Start Date and Frequency and the Term Sessions.
The Term Sessions will determine how many weeks the activity runs for each term.
You can then set the Day, Time and Duration of the activity, which will then be entered into the diary for the school/centre.
You can then opt to assign a Teacher to the activity. If you select the tick box labelled “Teacher” a drop-down list of all the teachers in the system will appear. If you are adding an activity from a teacher contact, then you will get the option to select the school/centre where it takes place.
You can then select if that piece of work for the teacher is on one of their contracts (either claims or contract) or if there is just a set fee for that activity. To see about setting up teacher contracts see Teachers.
 Once you are satisfied with the information you have included for your activity, use the Commit Activity icon shown here to save the activity.
You will also need to use the Save Record icon to save the School/Centre record. Your new activity should then appear in your listed activities.