Manage User Access to Xperios
Introduction
Access to the Xperios software is managed through the control of User Records and the optional use of User Groups assigned to those User Records.
A User Record is a type of Contact within Xperios, and any existing individual Contact can be made into a User. Alternatively, you can create a Contact Record for a new User.
User Records are associated with a Schooble account. To gain access to the system, the User must first sign in to their Schooble account. It is impossible to access the software and the managed data without being registered as a User with a Schooble account. The User must also have the correct credentials for the Schooble account.
Multiple Databases for One Person
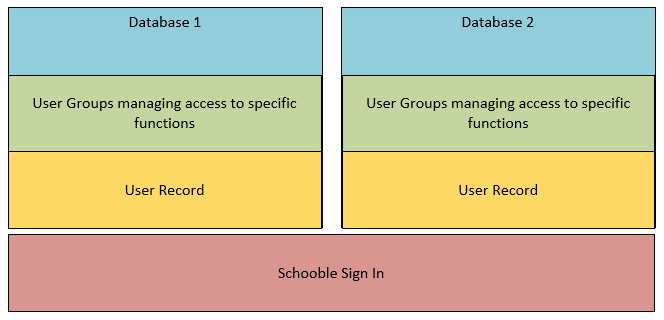
Each Schooble account belongs to an individual. An individual should only have a single Schooble account regardless of whether they are associated with several organisations.
An individual may be employed by more than one organisation and an organisation may have more than one database. However, the individual only requires a single Schooble account to access the databases. They will also need a User record within each database to access all their databases. Their role as a User and the functions they can access are defined within each database.
Enabling Access for a User
To enable access to Xperios for a User you must first check that you have enough Xperios licences, and you can add more if needed. See the Managing Licences section for more detail. Then define that contact as a User. This is done by creating a new contact or locating a Contact Record. The Contact Record must have a Name and a Work Email defined.
 While in Edit mode or adding a New Contact mode, select the “Make Contact a User” button.
This will add the User attribute to the current contact. A new top-level tab will appear on the screen titled “User”. This tab contains user-specific information including a User Group Membership (where the option to use Group Membership is enabled), Email Signature, and Dates. If Group Membership management is activated at least one User Group must be assigned to the User before they are granted access to Xperios.
When you save the changes by clicking on the Save button, the system will send an email using the Users Work Email. This acts as an invitation to link the contact’s Schooble account to the User Record you created.
This is done by clicking on a link within the email which takes the recipient to a webpage where their association can be confirmed.
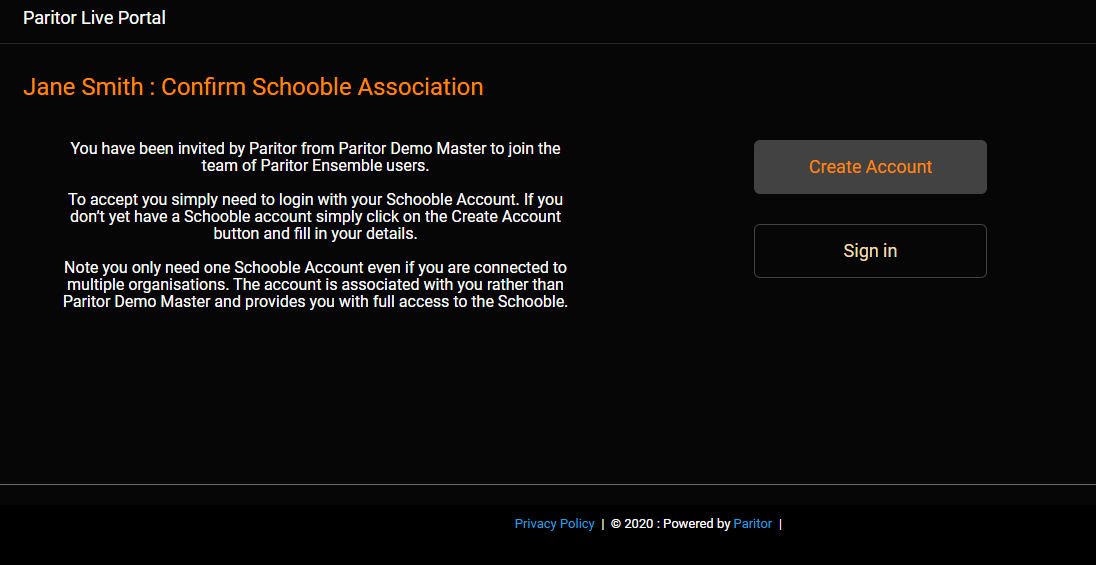
Schooble can be logged into with an existing account or a new Schooble account must be created.
Once completed the User will have access to Xperios.
Re-Sending User Invitations
It may occasionally be necessary to resend an invitation. This can be easily achieved by opening the Contact record for the User, clicking on the User tab, and from there selecting the Resend Invite button.
User Signature
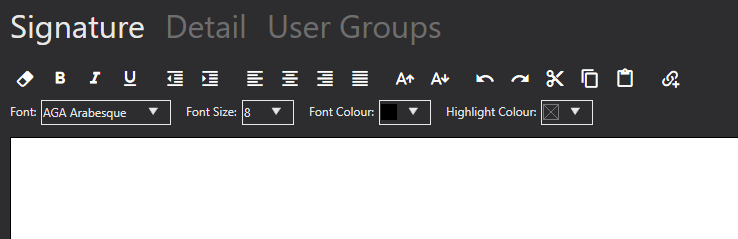
To edit your User signature, go to your Contact Record and click on the User tab followed by the Signature sub-heading. Next, use the Edit icon in the bottom left-hand corner to reveal the display shown in the example above. The User signature will be displayed at the bottom of all emails sent from this User. The HTML editor is used to edit this. Details of how to use the HTML editor can be found on page 29.
Adding Additional Email Addresses
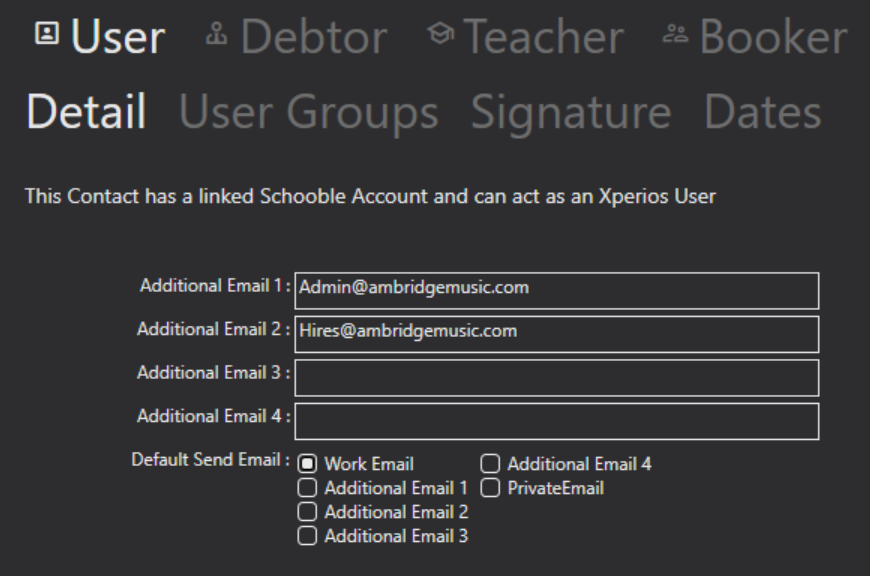
Some services have multiple email addresses that they contact their customers from. You can add these additional email addresses to your the User records. This allows Users to pick which account they send emails from. These can be easily added in by opening the Contact record for the User, clicking on the User tab, and selecting the Edit icon. On the Detail screen there will now be new fields (shown below). Enter the additional email addresses here. You can also select which email address is the default one to use. Finally, click the Save icon.