Authorising or Rejecting Credits
Credit Authorisation is a Setting that can be enabled/disabled within Xperios. See the System Settings > Users section of the help guide on how to do this.
For those with the Role assigned to the User Group, Credit Approval notifications will appear under the Tasks list.
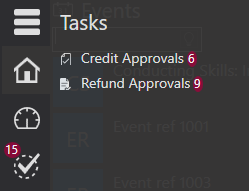 Tasks is found by clicking on the Tasks icon. The number of Credit Approvals to be completed is displayed beside the Task.
Clicking on the Credit Approvals option will show a list of those credits. Clicking on one of these credits will show the details to the right.
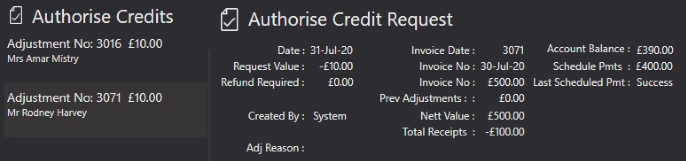
This display shows the details of the pending credit with information about the debtor. This includes the total account balance i.e., the amount owed by the debtor, any other invoices, the value of scheduled payments, and a refund value provided a refund is required.
The User has the option to Reject or Accept the credit. They can also click on Icons to open the associated activity, the pupil’s details, or the debtor’s details.

The first Icon will exit the authorisations without confirming an adjustment.

The second Icon will authorise the adjustments made.

The third Icon will reject the adjustments.
If the adjustments are rejected the credit is marked as rejected and will not be applied to the account. If the adjustments are accepted the amendment is authorised and applied to the account. In the example below, the credit has been accepted. By revisiting the financial summary for the activity, we can see several changes.
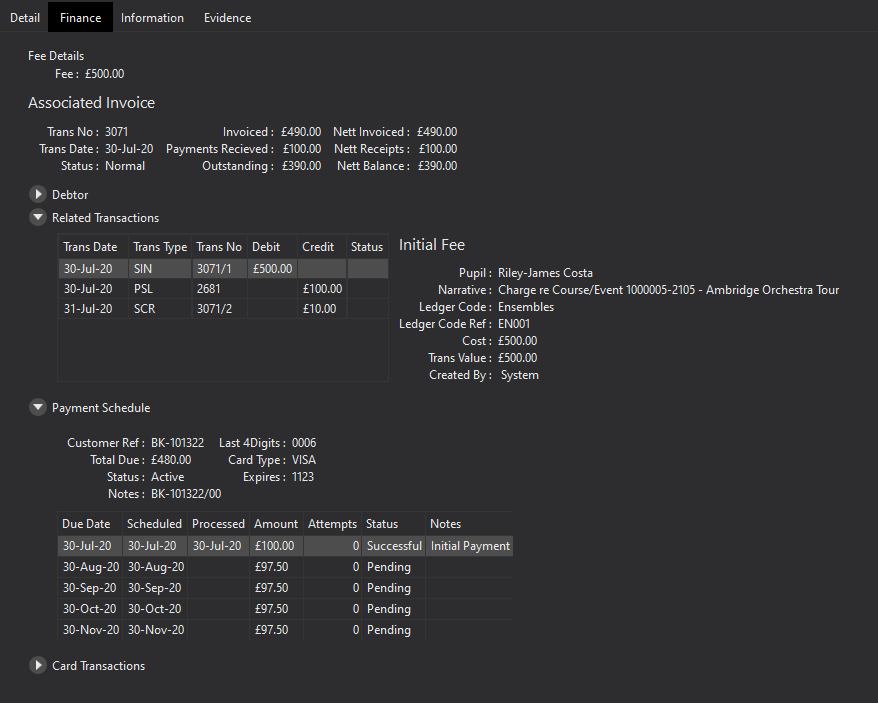
The outstanding balance will now be reduced by the credit amount. A credit will show in the list of Receipts and Refunds and will now be marked as Authorised. The Payment Schedule shows the reduced remaining scheduled payments which reflect the reduced Outstanding balance.