Schooble Account
Schooble is our identity management system. All Users of the software will need an account to access Xperios. It is also used by bookers, parents/guardians, or pupils that want to see their account activity, book tuition, and pay invoices. Each User should have ONE account regardless of the number of roles they perform e.g. teacher and parent, or if they are associated with more than one music service that uses Xperios.
To book onto any service, contacts will need to create an account or log in if they already have an account. They cannot book anything without a Schooble account. If a contact does not have a Schooble account and you want to grant them access to the portal, follow these steps:
To associate a contact with a Schooble account, open their Contact record and click on the “Schooble” tab. Here, you can find out if there is already a Schooble account associated with the Contact. You will need the contacts’ last name and email address to access this information.
At the bottom of the page, you will see the two icons below:

If the Contact has an email but no Schooble account, you can create one using this button. Once completed an invite will be sent to the recipient. This will allow them to sign into the Schooble account you have made for them using a temporary password.

This icon links a current Schooble account to your organisation by associating the existing account to your database.
By using either icon the recipient is sent an email with an invitation link. By following this link an association can be made. The link will connect to your portal, where the recipient can either create an account or sign into an existing one.
If the recipient creates an account, their details will be auto filled using the information stored in their Contact record within Xperios. Provided the Contact record holds all the relevant information the recipient will only need to create a new password.
Once an account has been created, they will be taken to the sign in page. Once signed in, the recipient will be able to view all their information.
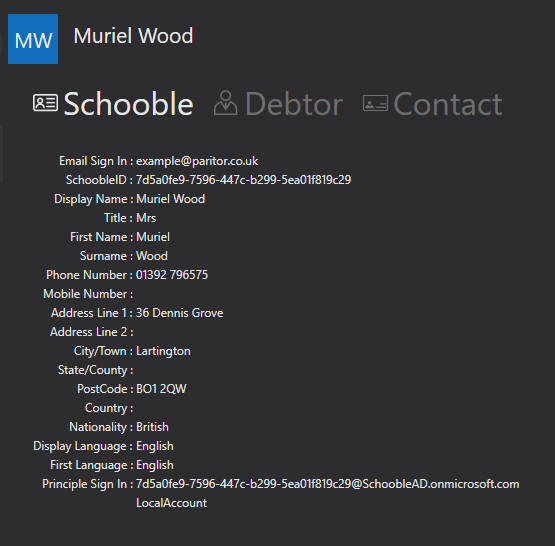
There will now be a different view under the recipients “Schooble” tab on their Contact record. All their data should match their contact details in Xperios. Here, you will also find an email address for the recipients Schooble sign in, as well as their unique Schooble ID.
Disassociating Users
In some cases, you may want to associate a contact with a Schooble account but are unable to because the email is already associated with another Schooble account. If this is the case, you will need to disassociate the account that holds that email from the Schooble account.
 This icon disassociates the Schooble account from the contact record. You will then be able to go back to the record that you wanted to associate with a Schooble account and send the contact an invitation.