Assigning Pupils to Lessons
To assign a pupil to a lesson, open your contacts and search for the school or centre where the lessons is taking place. Once you have opened the record click on the “School” or “Centre” tab and open the “Activity” tab. You will see a list of the activities that are taught at that specific school or centre.
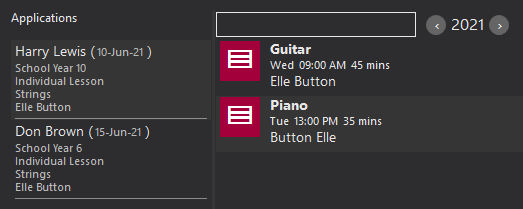
 This icon will display a list of all the applicants for that activity, as shown in the example here.
Now, you can drag and drop any applicant from the list into the activity. This will open the next display as shown below.
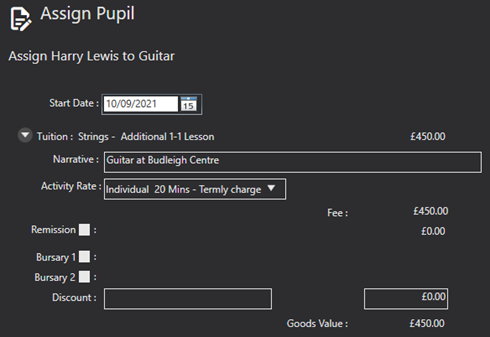
Here, you can select the intended “Start Date” for lessons. You can also choose the “Activity Rate” using a tick box and drop-down list of options.
Please note, that the Activity Rate is used for looking-up the basic cost and can be overwritten as well as undergo further reductions, remissions, bursaries, and discounts. If applicable you can then select to add a hire to the pupil, as shown below.
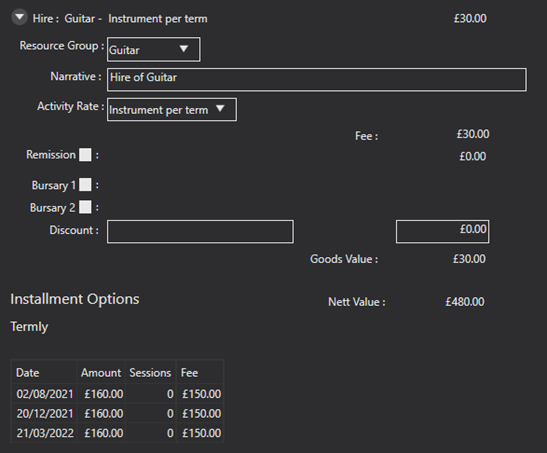
You can select the resource group of the hire and the activity rate related to that hire. Again, you can add remissions, bursaries, and discounts to the cost. At the bottom of the page, you will see the cost with the instalment options that will relate to the instalment option you have set up in your system settings. These can be altered in your system configuration. To see how to do this, please seepage. Once you are happy with the tuition offer, use the save record icon. This will then go to the debtor as an offer where they can accept or reject it, and if they accept it, they can pay the first instalment.
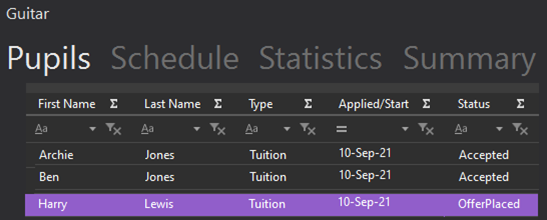
The pupil will no longer appear as an applicant for the activity. They will appear on the” Pupil” tab of the selected activity as shown below. Ensure that you save a second time to apply your changes to the database.