Understanding what Resources are
There are different types of Resource options: instruments, sheet music, costumes, and equipment. These types determine your specific Resources and are assigned a Resource Type and Serial/Reference Number.
Adding a Resource
Before you add a resource, you will need to add resource categories, resource groups, and resource locations. To see how to set these up click here.
To add a Resource, select “Resources”under the Tuition icon in the side-menu bar. Click the “Add Resource” button. A display like the example below, should appear.
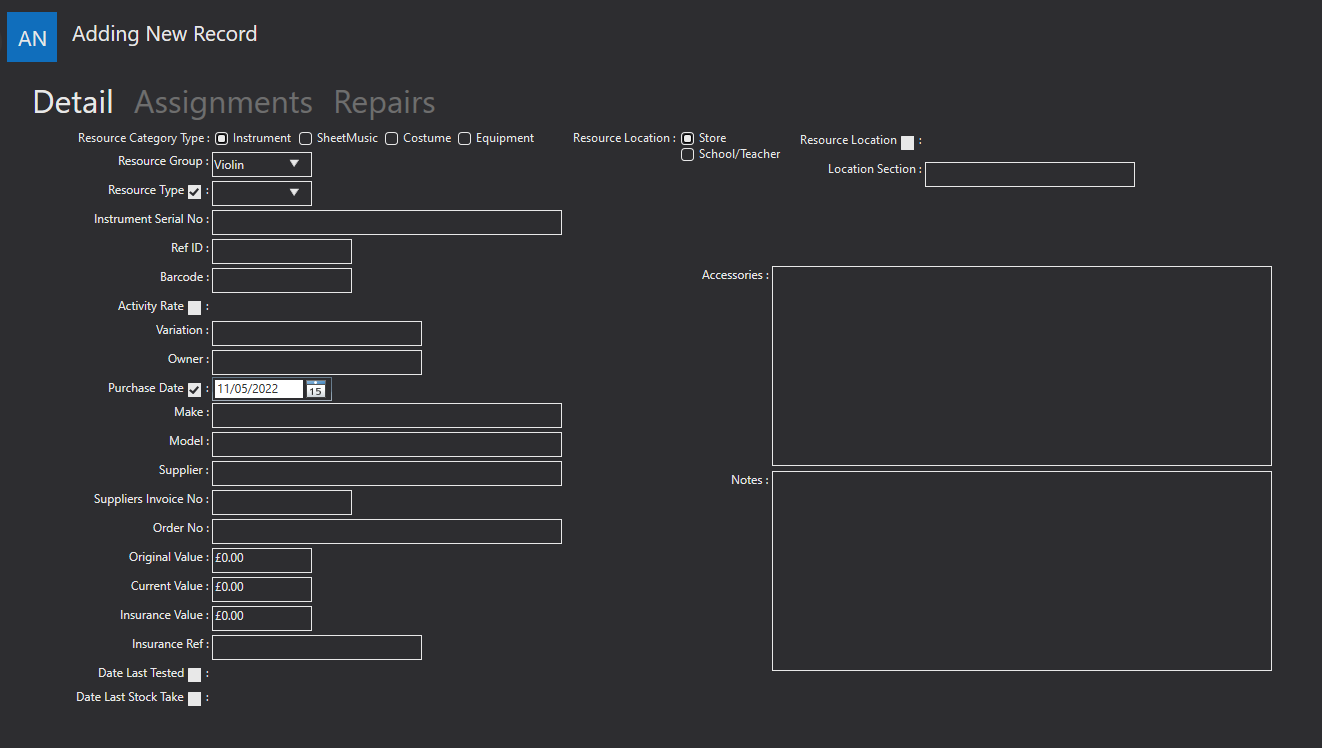
The Ref ID is individual for each Resource and helps to identify them.
The Resource Group, Type, and Location are all defined within “Settings” and will appear here as a drop-down list. Only the resource types that belong under the selected Resource Group will appear.
The Resource Group is compulsory, whereas the Resource Type and Location are not.
You can also provide details of who the current owner is.
The Location Section can help you find the instrument. For example, suppose the location from the drop-down menu is a warehouse. In that case, the section might be the specific aisle in that warehouse.
The Purchase Date allows you to keep track of how long you have owned the Resource.
You can include a Disposed of Reason using the tick boxes available. Options include “Exchanged”, “Lost”, “Sold”, “Stolen”, “Held”, and “Written Off”. The Disposed of Date is optional and should only add by selecting the tick box if you have disposed of the Resource.
The Date Last Stock Take allows you to record whether the resources are being kept track of.
If your Resource has a barcode, then you can add it under the field labelled Barcode.
You can then assign the Resource to a teacher if required. This will then appear in the teacher’s resources in their online portal.
You can use the Notes to add any information about accompanying accessories for the Resource and any additional information.
Once you are satisfied with the information included, you can use the “Save Record” icon.
If you have added an instrument Resource, you may find a few extra options detailed below when you go back to edit it.
The Variation specifies the instrument's material in question, i.e., whether it is metal, plastic, or any other kind of material.
Then, you can include further details such as the Make and Model of the Resource and the Supplier and an Invoice and Order Number. This can be helpful if any problems should arise concerning the Resource.
The Original Value and the Current Value allow you to see how the Resource is depreciating.
Also, you can include any Insurance information for the Resource.
Editing a Resource
 To edit a Resource record, find the record that you want to Edit and select the “Edit Record” icon in the bottom left-hand corner. Selecting this will show a similar display to the example screenshot above. Here, you can fill in and Edit all necessary fields.