Sage Pay
1. To accept payments using SagePay you will need a live SagePay account.
2. Login to your MySagePay account at: https://live.sagepay.com/mysagepay/login.msp or alternatively https://test.sagepay.com/mysagepay/login.msp if you are setting up an initial test payment.
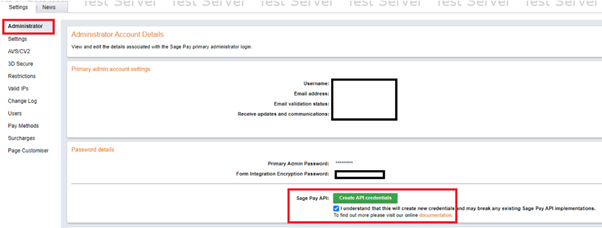
3. You will need to sign in as a user with administrative rights to view your API key. Head to the Administrator tab and click Create API credentials. Caution: This will void any API key you have previously generated within MySagePay.
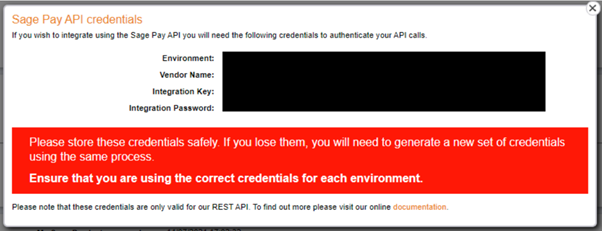
4. You will need to make a note of the integration key and the integration password, as these are used in Xperios and the Live Portal. We will also need a payment reference – this may be the same as your vendor’s name. Sage will be able to provide assistance if you are unsure about this.
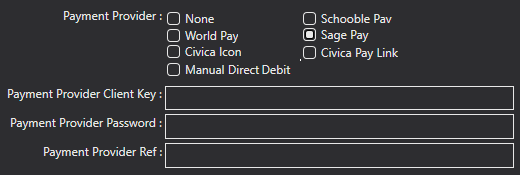
5. You will need to input these into Xperios under your Payment Configuration settings. To do this open Xperios and go to system configuration which is under the organisation heading of settings. Then go to the payments tab and use the edit icon to enter edit mode. Then select Sage Pay, and you will see the screen shown below. Enter the client key(which is the integration key), password (which is the integration password), and ref.
6. Before you can use MySagePay to take online payments via our Live Portal, you will need to whitelist Paritor’s IP addresses. You can do this by going to Valid IP’s and clicking Add.
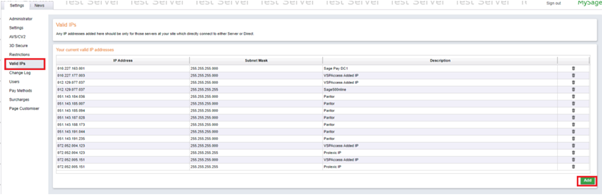
7. The Paritor owned IP addresses you will need to whitelist are as follows:
- 51.143.191.44
- 51.143.184.36
- 51.143.185.7
- 51.143.187.28
- 51.143.188.173
- 51.143.185.94
- 51.143.191.235
- 020.090.244.170
- 020.090.244.174
- 020.090.245.016
- 020.090.245.073
- 020.090.245.121
- 020.090.245.250
8. You have now successfully setup MySagePay to take payments.