Adding an Audition
Adding an Audition
 To add an Audition, select the Tuition icon followed by Auditions. Then click on the plus icon to add a new record.
A screen like the example shown below should appear.
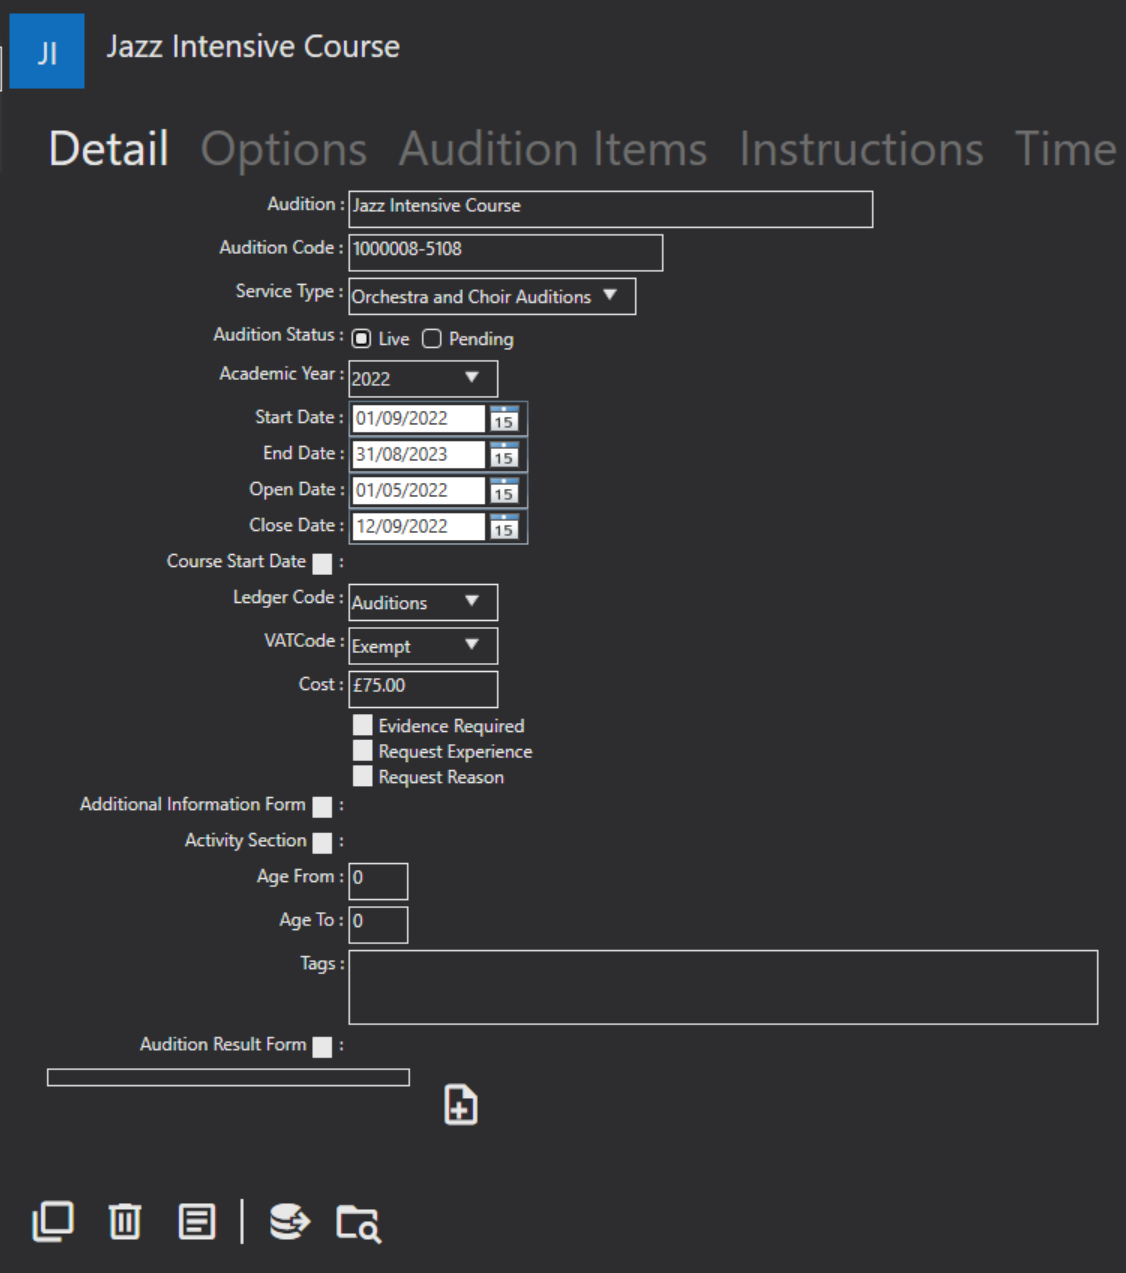
Audition text box at the top of the form should include the name of the Audition you wish to add.
Audition Code is a unique reference number that Xperios will automatically assign to your new Audition. You can override this number reference if a different code is preferred.
Service Type must be selected from a drop-down list. Your Service Type is the division within your organisation that you wish to assign this Audition to. Each Service Type will ask for specific requirements from your applicants.
Audition Status can be:
Cancelled - the Audition has been cancelled.
Live - the Audition is accepting bookings at this time.
Pending - the Audition will be taking bookings in the near future.
Academic Year when the Audition takes place. This will be a drop-down list of academic years you have set up.
Start Date and End Date boxes should be changed to show the start and end dates for auditions.
Open Date and Close Date are the dates on which bookings for the Audition are open. These can be adjusted in the same way that the Start Date and End Date can.
Course Start Date should include the date that the Audition for the course, performance, etc., will begin if the applicant is successful.
Ledger Code is used for the financial tracking of certain departments within an organisation. For example, in a music school, each lesson type might have a different Ledger Code. Therefore, the corresponding Ledger Code for this Audition should be included here.
VAT code records the amount of VAT applicable to the cost of auditioning. This can vary internationally depending on what the organisation has to offer. The drop-down box beside VAT is intended to record this information. A VAT code can be created under Settings, then Accounts, followed by VAT Code. From here, you can access the VAT Code and VAT rate boxes to set up a VAT option.
Cost refers to the Cost of the Audition.
Evidence Required tick box can be selected if you wish applicants to include a portfolio, qualification, or evidence of skill level with their application. The Admin staff will review this once the application is received.
Request Experience check box is like the evidence Required check box. The applicant can write a statement when this check box is selected. Click on the box to select or unselect this option for Audition applications.
Request Reason check box will allow the Audition applicant to fill out a text box field that explains why they want to be a member of the establishment.
Additional Information Form check box should be selected if there are further questions that your organisation wishes to ask an audition applicant. An Additional Information Form can be created by clicking on the Settings icon followed by Organisations, then Forms. Select the Add a New Record Icon at the bottom of the page to create a form.
Activity Section and Activity Level are both set up in your system settings. Activity level will only appear if the activity section is tick. Ticking this will also make the catalogue tab appear.
Age From and Age To boxes should be filled with the age range applicable for this Audition.
Tags can be added and will be included in reports. You can then filter based on your added tags.
Audition Result Form is a drop-down list of the forms you have set up in Paritor Forms.
Once complete save the record.
Editing an Audition
 To Edit an Audition, go to Auditions and click on the one you want to edit. In the left-hand corner you will find the Edit Record icon. Selecting this will open a window like the add record view, however, it should also include the fields you filled in previously, when creating the Audition.
 When you Edit your record, the back arrow will appear. This allows you to Undo Edit Changes. The back arrow will not work after you have saved the record as your new changes will have replaced your previous save.
 Once you have finished adding or editing your Audition select the Save button in the left-hand corner. Note: this will not appear until you have added or edited at least one piece of information.